Showing posts with label Easy Recipes. Show all posts

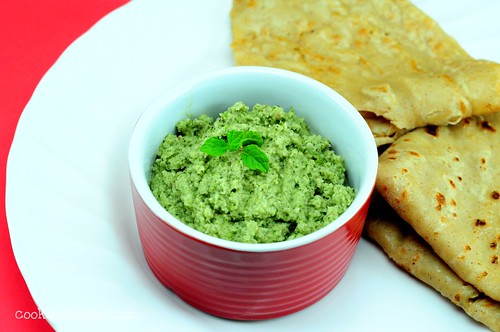
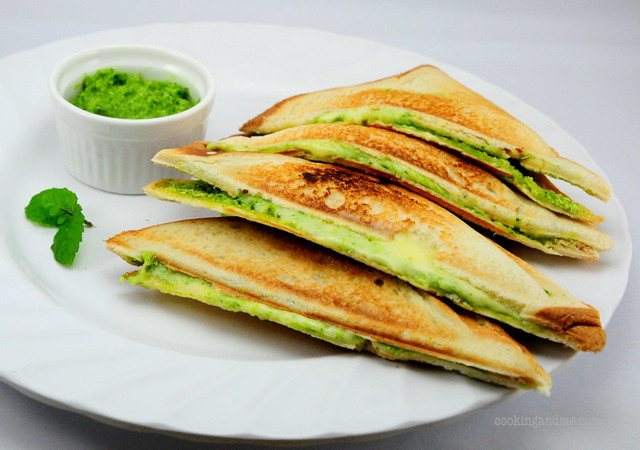
Green Mint Chutney & Cheese Sandwiches

Picnic food is fun to make, especially if you are not really going on a picnic but just pretending to on a rainy, weary weeknight.

About once a month, TH and I have sandwiches for dinner. Its just one of those inexplicable things we do.
DSC_2430

Since I got my mint plant, there's no dearth of fresh mint and I love using fresh herbs in my cooking. Well, don't we all?

This is a quick sandwich recipe that works great for a picnic, tiffin box or even brunch or tea party. It tastes great and is filling too!

Mint Chutney and Cheese Sandwiches
Makes 4 - Serves 2

Ingredients:
8 slices of bread of your choice
4 slices of cheese

For the Mint Chutney:
A bunch of fresh mint leaves
1/2 cup freshly grated coconut
1 green chilly
1/2 tsp minced garlic (optional)
A pinch of dry ginger powder or 1/2" piece of fresh ginger
Salt to taste

Grind all ingredients together with very little water to a smooth paste.

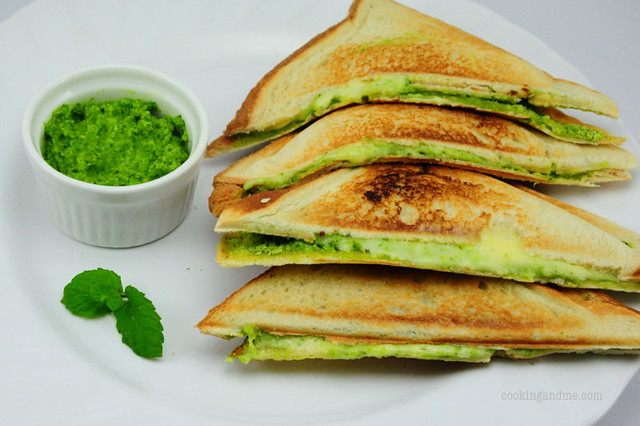
To assemble and toast the sandwiches: Spread a generous amount of the mint chutney on one side of the bread slice. Top with a slice of cheese and toast in a sandwich maker until done. You can also toast in a pan on the stovetop with a pat of butter until both sides are golden brown and the cheese has melted.
DSC_2440

Serve hot with ketchup.
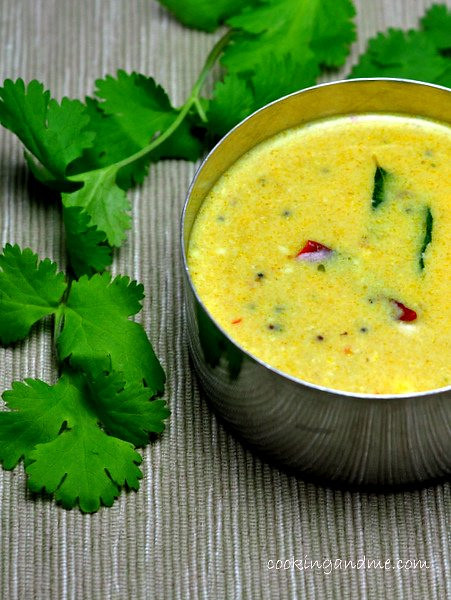
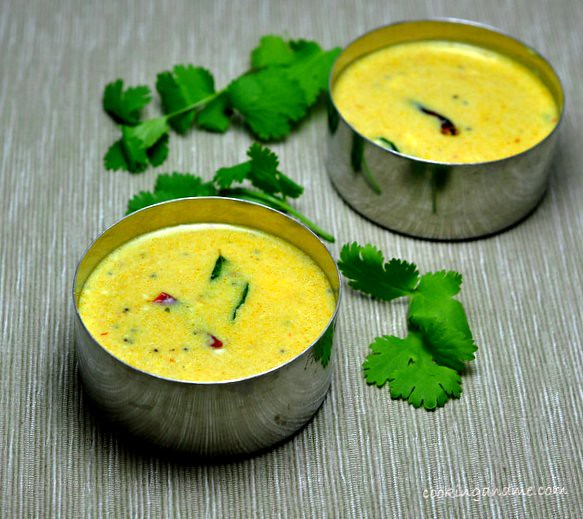
Green Mor Kozhambu / Buttermilk Curry Recipe

Mor Kozhambu / Moru Kachiyathu is my go-to kozhambu recipe when I am in a hurry or I have spent too much time making the side dishes. Its quick, easy, and delicious and both of us like it. 

green mor kozhambu recipe

There's a small twist to this recipe - I added fresh coriander leaves to the coconut paste. The flavour is distinct and very enjoyable. A great idea if you have coriander-indifferent people in the house.

Green Mor Kozhambu Recipe
Serves 2-4

Ingredients:
2 cups buttermilk + 1 cup water
Salt to taste

Grind Together:
1/2 cup grated coconut
1/2 tsp jeera
A pinch of turmeric powder
1/2 cup coriander leaves, loosely packed

For Tempering:
2 tsp oil
1/4 tsp mustard seeds
5-6 fenugreek seeds
1" piece of ginger, crushed
1 dry red chilli, halved
A few curry leaves

How I Made It:

1. Heat oil for tempering. Add the rest of the ingredients in the order given. When the mustard seeds pop and the fenugreek seeds turn a golden brown and fragrant (take care not to burn!), add the ground coconut paste. Mix well and turn off heat.

2. Add the diluted buttermilk, mixing well as you do. Add salt.

Serve with warm rice and side dish of choice.

Kerala Parippu Curry / Kerala Yellow Dal Recipe

Ever had a Kerala sadya? If you have, then this parippu (dal) is the first thing you would mix with rice and ghee and feel the first flavour of what is essentially the essence of Kerala food. 

Kerala Parippu Curry Yellow Dal Recipe

Before you ask, of course we add coconut to our yellow dal, we wouldn't have it any other way for a dal recipe that's uniquely Malayali! For Kerala cooking, split yellow lentils / moong dal cherupayar, is more used than toor dal. Moong dal is also a very important ingredient in Ayurveda based cooking and is said to have a better effect on our health than most other kinds of lentils. 

Kerala Parippu Curry Yellow Dal Recipe

Kerala Parippu Curry Recipe
Serves 4

Ingredients:
1 cup moong dal / cherupayar / split yellow dal
A pinch of turmeric


Grind Together:
1/2 cup coconut (fresh or frozen, not dessicated)
1 tsp cumin seeds / jeera / jeerakam
2-3 shallots
2-3 green chillies

For Tempering:
1 tbsp coconut oil
1/4 tsp mustard seeds / kaduku
3 shallots, sliced
1 red chilli, torn into two
A few curry leaves

How I Made It:

1. Roast the dal in a dry skillet until it turns a light golden brown. I generally do this in bulk and store moong dal this way to prevent bugs. It also makes the dal much more fragrant after cooking.

2. Grind the coconut with the rest of the ingredients and some water into a smooth paste.

3. Pressure cook the moong dal with 4 cups water and a generous pinch of turmeric. Once done, mash well to a smooth paste. Keeping the flame on low, add the ground coconut mixture and some salt to the dal. Cook until well blended - about 5-8 mins.

4. Heat oil for tempering and add the ingredients in the order given. Once the mustard seeds have popped and the red chilly starts to glisten a deep red, remove from fire and dunk everything into the dal mixture. Mix well.

Kerala Parippu Curry Yellow Dal Recipe

Serve hot with steamed rice and ghee. 

This Kerala Parippu Curry goes to Kerala Kitchen hosted by Ria this month. 

Butterscotch Chip Cookies Recipe

Although I have made chocolate chip cookies a few times, its intereting that they've never shown up on the site before. But these butterscotch chip cookies were too good not to share. 

DSC_1236

Chunky, fudgy, gooey, yum!

butterscotch chip cookies recipe

Nestle butterscotch chips are not always available in Singapore. I once saw a bag in Cold Storage in Bugis but it was overpriced and the expiry date was in another month so I didn't get it. Then, Sala sent me an awesome goodie bag and there were butterscotch chips in that!

butterscotch chip cookies recipe

The cookie dough comes together in a jiffy and this is really a no-fail, easy recipe. 

Butterscotch Chip Cookies
Adapted from Cooks.com
Makes ~16 cookies

Ingredients:
1/4 cup regular white sugar (see note below)
1/4 cup brown sugar
1/2 cup butter at room temp
1 tsp vanilla extract
1 egg
1.5 cups flour
1/2 tsp baking soda
A generous pinch of salt (if using unsalted butter)
3/4 cup butterscotch chips

How I Made It:

1. Preheat oven to 350F/180C. 

2. In a bowl, combine sugars with the softened butter until smooth and creamy. Add vanilla and the egg and beat well until well combined.

3. In a separate bowl, combine the flour, baking soda and salt well with a fork. Add this to the wet mixture and combine well. Then add the butterscotch chips. The dough will be thick. Make sure you distribute the chips as well as possible.

4. Line a baking tray with parchment paper or a baking sheet. Use an ice cream scoop to drop the cookie dough on the baking tray. If you don't have an ice cream scoop, use 2 spoons, one to scoop up the dough and the other to smoothen it a bit and lower it on to the baking tray.

5. Bake for about 15 minutes until the top turns a light golden brown.

butterscotch chip cookies recipe

Note: Even though I reduced the amount of sugar and chips from the original recipe drastically, the cookies we still quite sweet. We couldn't have more than one at a time and that's just not done. So you can reduce the amount of sugar if you want it to accompany coffee/tea/milk. 

Aloo Bhindi / Potato Okra Dry Sabzi

Fact: Okra is slimy
Another fact: Potatoes are delicious
Fact 3: When delicious and slimy get together, it creates a pretty great dish. 

aloo okra sukhi subzi recipe

When I go to the nearby supermarket, I run out of vegetables to buy. There are about 5 rows of green leafy vegetables which I can't bother with over weeknights, and there are the usual suspects like beans and carrot and broccoli and capsicum. I just have to reach for the okra packet on those nights. 

Aloo Bhindi Sukhi Sabzi Recipe
Adapted from: Sailus Food
Serves 2

Ingredients:
1 potato, cut into small cubes
10 okra, cut into 1/2" discs
1 tbsp tamarind water (add a small piece of tamarind to 1 tbsp water. Extract juice, discard pulp)
~ alternatively, use freshly squeezed lemon juice or a generous pinch of amchoor / dry mango powder

1 tbsp oil
1/4 tsp mustard seeds
A generous pinch of hing / asafoetida / perungaayam
1/2 tsp jeera / cumin seeds
1-2 tsp dhania / malli / coriander powder
1/2 tsp red chilli powder (adjust to taste)
1/2 tsp garam masala or curry powder (whatever you have in hand)
A pinch of ginger powder (optional)
1/4 tsp turmeric powder
A few curry leaves
Salt to taste

How I Made It:

1. Heat oil and add mustard seeds. When they pop, add the rest of the ingredients below in the order given.

2. Once the masalas have been fried for about a minute, add the cut vegetables and the tamarind water. Mix well until all the ingredients are well incorporated.

3. Cook covered, stirring frequently, until the potatoes are tender and the okra is cooked, non-slimy, and has learnt a thing or two from the potatoes. 

aloo okra sukhi subzi recipe

Serve hot with steamed rice and gravy of choice. 

Geetha Perima's Strawberry Milkshake Recipe

I suck at two things - taking a decent picture of drinks, and taking pictures with a dark background. So when your (husband's) aunt does these two super well and posts pictures on Facebook, you do what any self-respecting food blogger does - flick the picture, add your watermark, ask her the recipe, and post it on your blog!

strawberry milkshake recipe

Of course, it may be a good idea to ask her first! 

I have posted two recipes of Geetha Perima's before. The Instant Sambar Powder Mix recipe which was the answer to many a mothers' quest for a sambar powder to send their sons/daughters going off to a foreign land. You should check it out, its brilliant!

The other recipe I got from her and tried it myself (instead of shamelessly taking pictures of what she made or worse, flicking it from her FB page) - the amazing Palak Khichdi! 

Now on to her Strawberry Milkshake Recipe. Thanks for the patient answers to all the 11 questions I had on a recipe that uses 3 ingredients, perima. 

To serve 2, you need: 

7-8 fresh strawberries
2 cups whole milk
Sugar to taste

To prepare: blend the strawberries with the milk and sugar until frothy and well incorporated. You can adjust the number of strawberries depending on their size. On an average, you need 3-4 for each cup of milk. 

Garnish with sliced strawberries and serve cold. Yumville!

This strawberry milkshake goes to Pari's Veggie/Fruit a Month, this month featuring Strawberries - an event conceptualized by Mharo Rajasthan.

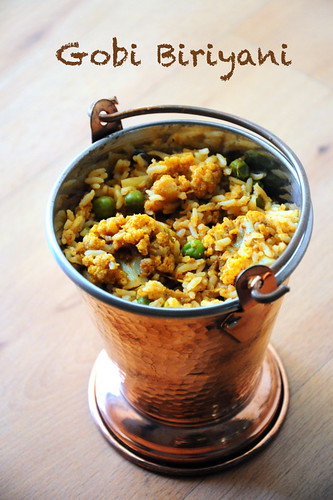
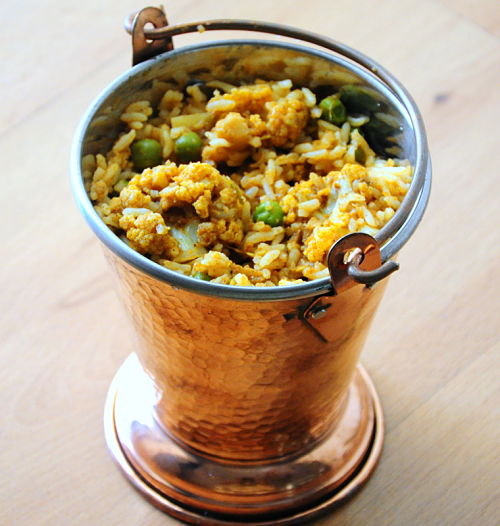
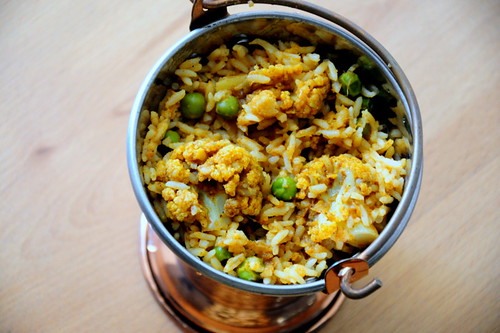
Super Quick Cauliflower / Gobi Biryani Recipe

Yes, I totally made this recipe up. There's no such thing as a Cauliflower Biriyani. No, you are right, cauliflower does get added on to vegetable biriyani occasionally there's no biriyani that's exclusively dedicated to cauliflower.

gobi biryani recipe

I am also going to say this up front before you read through the whole recipe and get disappointed. You need Biryani Masala to make this recipe. Its not one of those grind-your-spices-fresh type of recipe because that would make this a non super quick dish, and today we are all about super quick.

Its also a prerequisite to like cauliflower inorder to enjoy this dish.

gobi biryani recipe

Gobi / Cauliflower Biryani Recipe
Serves 3

Ingredients:
1.5 cups basmati rice (or any long-grained rice)
1 large onion + 2 green chillies, ground to a paste
1 large tomato, pureed
A handful of green peas (fresh or frozen)
1 medium sized cauliflower, washed and cut into florets (around 4 cups)
1 tbsp ghee (or oil)
Fresh chopped coriander leaves for garnish (optional)

The Masala
1/2 tsp jeera / cumin
1 tsp dhania / coriander powder
A pinch of turmeric
1 tsp ginger garlic paste
1 heaping tbsp of biryani masala
Salt to taste

How I Made It:

1. Cook the basmati rice in 5 cups of boiling, slightly salted water until cooked but still firm. Set aside.

2. Heat the ghee in a pan and add the onion-green chilly paste. You can also slice the onions and chillies and add it that way but I felt like grinding it so I did. Fry the onion paste for about 2 mins. It will start losing moisture and get thicker.

3. At this stage, add all the masala ingredients in the order given. Fry well for about a minute till it starts smelling gooood.

4. Add the tomato puree, peas and cut cauliflower florets. Give it a good mix and cook closed on low fire until the cauliflower is cooked soft, yet retains its shape (about 5-7 mins). You can sprinkle some water if you feel the mixture is getting too dry.

5. Once done, check salt and then mix in the cooked rice gently until well combined. Garnish with chopped coriander leaves and serve with any raita and papad.


The preparation time for this biriyani is significantly less because you are not pounding any masala last minute. Depending on what biriyani masala you use, you will get a distinct flavour each time - I love that variety!

Mint / Pudina Coconut Chutney Recipe

I bought a mint plant the other day and its growing like a wild bush in its small pot. To use up some of the fresh and insanely flavourful leaves, I made a mint coconut chutney to go with wheat dosas. 

DSC_1023
Yes, they are over-exposed, but too lazy to edit much :D
Its incredibly simple and takes all of 10 mins to whip up. That's my kind of dinner, any day night!

mint chutney 3

Mint / Pudina Coconut Chutney
Serves 2

Ingredients:
1 cup fresh grated coconut (not desiccated)
1/2 cup loosely packed fresh mint leaves
2 shallots
A tiny piece of ginger
A tiny piece of tamarind
2 green chillies (adjust to taste)
Salt to taste

To make chutney - grind all ingredients with very little water. Serve immediately with dosa, or even rice. This goes really well with the slightly dense and bland wheat dosa.

mint chutney 2

All pictures in this post taken in the home made light box for food photography.

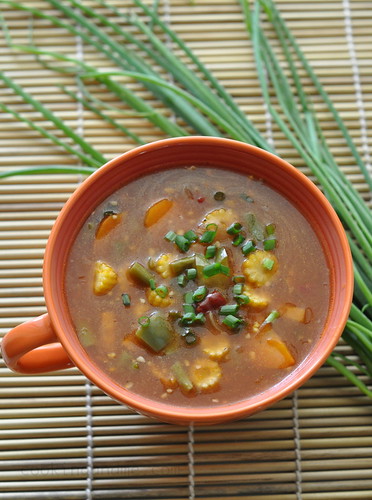
Schezwan Vegetables Recipe - Indo Chinese Series

Understandably, you all loved the Chilli Paneer Recipe I posted last week. Of course, frying up something and mixing it in a delicious spicy sauce should be up everyone's alley, no surprises there.

indo chinese schezwan vegetables recipe

After moving into the new apartment, we had friends over and I decided on an Indo-Chinese menu. I was badly craving some and grabbed the opportunity to cook some up myself. I made the Chilli Paneer, Vegetable Fried Rice and Schezwan Vegetables for some gravy to go with the fried rice.

Schezwan Vegetables Recipe
Adapted from Sailus Food
Serves 4

Ingredients:
1 large onion, cubed into 1" pieces roughly
1 carrot, cut into small, thin discs
8-10 french beans, cut into 1″ pieces
8 baby corns, each cut into 6 round discs
1 green capsicum, cut into 1" pieces roughly
2 tbsps oil
2 tbsps finely chopped spring onion greens (for garnish, optional)

For The Sauce:
2 dry red chillis, halved
1/4 tsp red chilli pwd
1 tsp crushed garlic (about 6 small flakes)
1.5 tsp soya sauce
1 tsp brown sugar
1 tbsp tomato ketchup
2 tbsps tomato puree (or 1 tsp tomato paste)
1 tbsp cornflour
1 cup water
salt and pepper to taste
2 cups vegetable stock or water (I used vegetable stock)

How I Made It:

1. Heat oil in a pan and add the onions. Cook until soft and transparent - about 3 mins.

2. Add the remaining vegetables with some salt and saute lightly for 3-4 mins.

3. Mix all the sauce ingredients together and add to the cooking vegetables. Let it simmer for 5 mins or until the vegetables are cooked, yet firm. If the gravy is getting too thick, add more water. Adjust salt and add pepper and spring onion greens - and its ready to serve!

indo chinese schezwan vegetables recipe

This is one of those dishes where the preparation time is higher than the cooking time but the end result is very satisfying and can really help you get rid of your Indo-Chinese craving!

New Year Morning Waffles Recipe

Most of you may already know this if you are in my Facebook list but here's the formal announcement - I bought a KitchenAid! It may not be a big deal to some but I had been wanting one for ages now and kept pushing back because of lack of counter space in my previous apartment kitchen and, its pretty expensive here in Singapore. Anyway, things worked out, we moved, and now I own one!

DSC_0585-2

I wanted to use it the first day of the year (don't ask me why!) and decided to make waffle batter in it. Waffles are one of my favourite foods of all time and I have owned a waffle iron for a while but don't make it as often as I'd like.

I should though. In fact, I should make waffles for dinner, that's what I should do.

Basic Easy Waffles Recipe
Adapted from 3 Many Cooks
Makes 6

Ingredients:
1 egg, separated
1 cup buttermilk (I used 1/2 cup homemade yogurt mixed with 1/2 cup water)
1 cup plain flour
2 tbsp sugar (adjust to taste or omit completely)
1/2 tbsp baking powder
1/2 tsp baking soda
1/2 tsp salt
2 tbsp cooking oil (I used olive oil)

How I Made It:

1. You don't need a stand mixer for this but if you do, just dunk in the following ingredients and mix it up on speed 2 for 1-2 mins. If you don't, just do the same with your hand whisk in a bowl. First add the flour and sugar..

DSC_0525-2

2. Followed by the buttermilk..

DSC_0526-2

3. Egg yolk..

DSC_0530-2

4. Baking powder and baking soda..

DSC_0531-2

5. Salt..

DSC_0533-2

6. And oil..

DSC_0534-2

7. Mix mix mix for about 2 mins or so on low speed. Then set aside.

DSC_0540-2

8. Now you need to beat the egg whites until stiff. I used my hand-held whisk for this.

DSC_0545-2

9. Whip well until soft peaks form on the top of the beaten egg whites.

DSC_0552-2

10. Add to the batter you've prepared and fold in gently without over-mixing.

DSC_0553-2

11. Heat your waffle iron until smoking hot.

DSC_0556-2

12. Add about 1/4 to 1/2 cup batter to the iron depending on the size of your iron. Remove when golden brown all over - mine took about 3 mins.

DSC_0565-2

I know there are 12 steps up there for a simple waffle recipe but its because I took very detailed pictures to show the steps. Its really a very easy and yummy breakfast to make so go ahead, buy that waffle iron if you don't have one already (Huge thanks to Darsh for lugging mine all the way from the US) Even if you use it only once or twice a month like I do, its still worth it.

DSC_0576-2

It was too early in the morning so I slightly burnt my waffles. But you still think I'm a decent cook right? Thanks! I knew confessing to you all would be totally safe :) Serve with a dusting of icing sugar or maple syrup to camouflage the burnt parts ;)

Now why don't you go check out my Project 365 site if you have a minute?

Semiya / Vermicelli Upma Recipe

As I've mention before in my rava upma recipe post, we usually have breakfast food for dinner. Rice is made generally only on weekends and so, its a constant challenge to come up with quick, variety food over weeknights.

DSC_0901

Semiya or vermicelli upma is not a new recipe, but something we have atleast twice a month. I make this often enough but only on weeknights so have never taken pics for the blog. Now that the new camera has hit the scenes, I had to try some night shots. These are the first of many posts, hopefully. I haven't done much editing except to add some highlights and the watermark.

DSC_0893

Roasting the semiya or vermicelli before adding it to the upma enhances the taste and makes sure it doesn't end up in a sticky clump, so don't miss this step.

DSC_0899

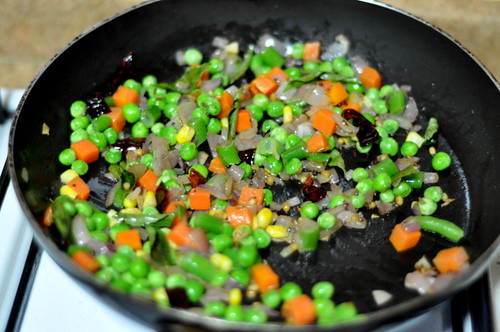
I always store a bag of mixed frozen vegetables in the freezer for precisely this purpose - upma and pulao gets done so much quicker and no messy chopping and washing and peeling necessary!

Semiya / Vermicelli Upma Recipe
Serves: 2-3

Ingredients:
2 cups vermicelli
3 cups water
1 small red onion, chopped
3/4 to 1 cup chopped vegetables of choice (carrots, peas, beans, corn, potatoe, etc)
2-3 green chillies, slit (I used dry red chillies since I didn't have any)
1" piece of ginger, grated
1 tbsp oil
1/4 tsp mustard seeds
1/4 tsp Bengal gram / kadala paruppu
A few curry leaves (optional)
Chopped coriander leaves for garnish (optional)

How I Made It:

1. Roast the vermicelli in a dry skillet or pan until golden brown. This will take about 4-5 mins but keep an eye on it and stir frequently otherwise they will brown on one side only or even burn. Set aside when done.

2. Heat oil in the same pan and add mustard seeds, curry leaves, Bengal gram and green chillies. When the mustard seeds pop, add the chopped onion. When it becomes transparent, add the ginger and the vegetables. Mix well until well coated and cook covered on sim for 6-8 mins until the vegetables are soft. Sprinkle some water if necessary.

3. Once the vegetables are cooked, add the water with some salt and bring to boil. Once the water comes to a rolling boil, dunk in the roasted vermicelli stirring continuously so that it doesn't clump. Let it cook in the open pan until the vermicelli has cooked all over and there's no water left. Usually a vermicelli : water ratio of 1 : 1.5 works well for me.

4. Garnish and serve hot with chutney.

DSC_0921
Vermicelli Upma and Coriander Chutney with a twist

Easy Basic Chocolate Brownie Recipe

I love using chocolate bars while baking and definitely feel like the taste and texture is significantly better when I do. The only thing that I don't look forward to is the melting of the chocolate, especially if it involves a double-boiler set up.

Basic chocolate brownies recipe

That's why these brownies are so ideal when you want a fuss-free, easy and yummy snack. The ingredients are most probably lurking in your pantry already and you need less than 20 mins to whip them up before sticking it into the oven.

Basic Chocolate Brownie Recipe with Cocoa Powder
Makes about 12 large squares
Adapted from here

Ingredients:
1/2 cup unsalted butter (doesn't have to be room temp, isn't that awesome?)
1 cup regular white sugar
1 tsp vanilla extract
2 eggs
1/3 cup unsweetened baking cocoa powder
1/2 cup all purpose flour
1/4 tsp baking powder
A pinch of salt

How I Made It:

1. Preheat oven to 350F / 180. Grease a 9" square (or round, who will know) pan.

2. Heat the butter on low flame until just melted (use the microwave or stovetop works just fine too). Stir in the sugar and vanilla.

3. Add the eggs one at a time, beating well after each addition. Add the cocoa; beat well until well blended.

4. Finally, add the flour, baking powder and salt; beat well.

5. Pour the batter into the prepared pan. Bake for 35-40 minutes or until brownies begin to pull away from the pan sides.

Basic chocolate brownies recipe

There are a dozen different ways you can customize this brownie, that's why this is the basic brownie recipe. Add orange zest, white chocolate chips, chopped walnuts, let your imagination go wild!

This basic brownie recipe is heading to The Chocolate Fest over at Cook Curry Nook.

------------------------------------------------------------------------------

On an unrelated note, a good friend who introduced me to the world of Yoga is now celebrating 10k hits to her blog - Back to Basics. She has some cool things to giveaway so go ahead and check them out before time runs out!

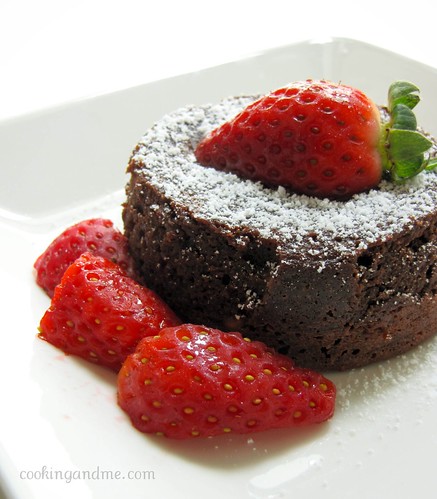
Molten Chocolate Lava Cakes Recipe

I know, that's a lot of chocolate discussion on this site over this week but when it comes to chocolate, there's never too much of it. Agreed? There you go!

This is our Sweet Punch challenge for October, so don't be surprised if you see a lot of chocolate lava cakes cropping up on blogs around you.
Molten Lava Choc Cake Recipe

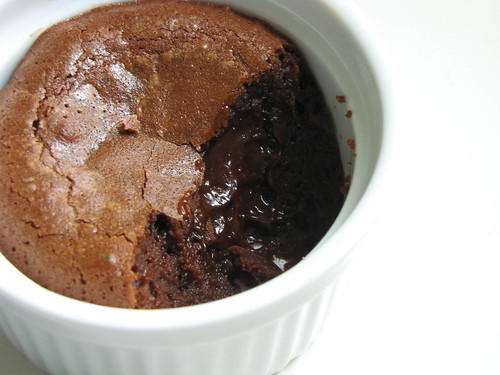
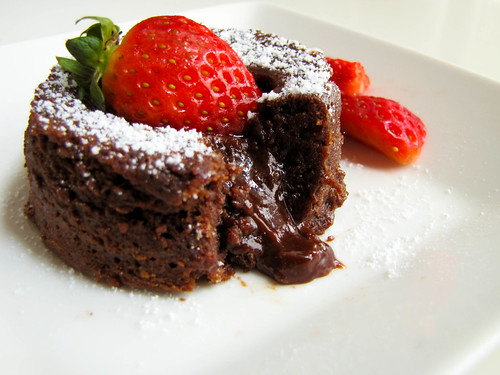
I baked this decadence over the weekend. It rose beautifully and the crust was cracked and heavenly. Be very careful not to burn your tongue on this. I speak from experience, like I almost always do. Learn from my mistakes, ok?

Molten Lava Choc Cake Recipe

Since neither TH nor I like very runny centres for our molten chocolate cakes, I increased baking time but made sure that the centre is still gooey and fudgy.

Molten Lava Choc Cake Recipe

Molten Chocolate Lava Cake
Fills 4 medium-sized ramekins
Recipe source - showmethecurry.com

Ingredients:
Semi-Sweet Baking Chocolate – 4 oz (113g)
Butter – 1/2 cup + to grease ramekins
Eggs – 2
Sugar – 1/3 cup (75 g)
All-purpose Flour – 1/4 cup (40g)

How I Made It:
1. In a double boiler, melt chocolate. Once melted and shiny, remove pan from heat and add in butter. Mix until the butter melts fully. Set aside to cool.
2. In a medium mixing bowl, beat the eggs and sugar until light and fluffy (about 3 mins by electric mixer, 5 mins by hand)
3. Add chocolate-butter mixture into the eggs, add all-purpose flour and mix until well incorporated.
4. Butter bottom and sides of ramekins (small glass/porcelain bowls) and pour in mixture until 3/4 way full.
5. Bake in a pre-heated oven at 350 degrees Fahrenheit (180 C) for 10 – 15 minutes. Shorter for gooey (molten) inside, longer for stiff inside. I baked for about 13-15 mins.
6. Serve warm with ice-cream, fruits or whipped cream.

Molten Lava Chocolate Cake Recipe

Yep, I had to push out some of the centre with my spoon to demo that ;) Now, one thing to remember is, you have to serve this with some fruits, whipped cream, or ice cream to balance out the dense chocolate flavour - its really overpowering. True death by chocolate!