Showing posts with label Kerala Recipes. Show all posts

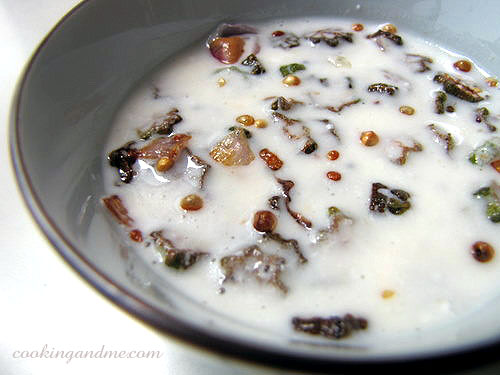
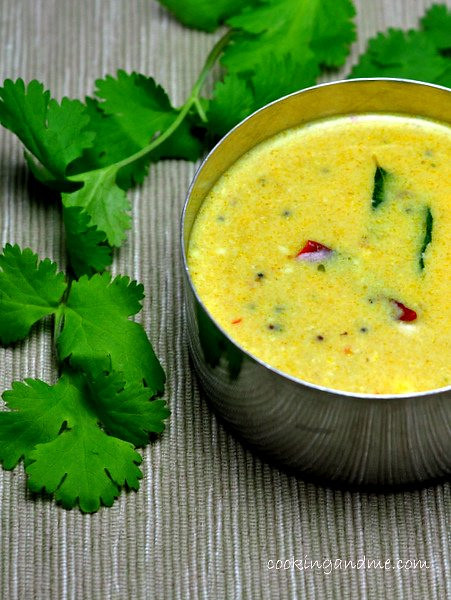
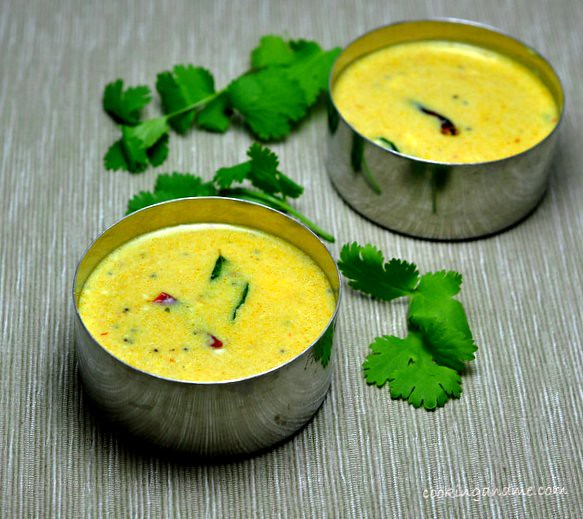
Green Mor Kozhambu / Buttermilk Curry Recipe

Mor Kozhambu / Moru Kachiyathu is my go-to kozhambu recipe when I am in a hurry or I have spent too much time making the side dishes. Its quick, easy, and delicious and both of us like it. 

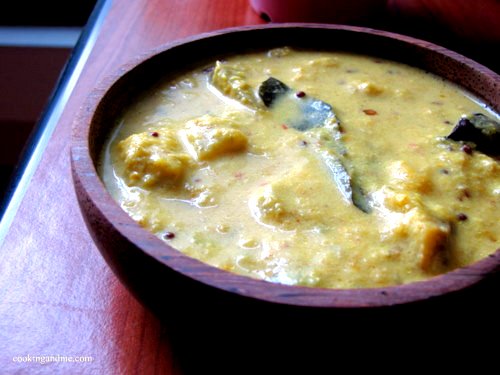
green mor kozhambu recipe

There's a small twist to this recipe - I added fresh coriander leaves to the coconut paste. The flavour is distinct and very enjoyable. A great idea if you have coriander-indifferent people in the house.

Green Mor Kozhambu Recipe
Serves 2-4

Ingredients:
2 cups buttermilk + 1 cup water
Salt to taste

Grind Together:
1/2 cup grated coconut
1/2 tsp jeera
A pinch of turmeric powder
1/2 cup coriander leaves, loosely packed

For Tempering:
2 tsp oil
1/4 tsp mustard seeds
5-6 fenugreek seeds
1" piece of ginger, crushed
1 dry red chilli, halved
A few curry leaves

How I Made It:

1. Heat oil for tempering. Add the rest of the ingredients in the order given. When the mustard seeds pop and the fenugreek seeds turn a golden brown and fragrant (take care not to burn!), add the ground coconut paste. Mix well and turn off heat.

2. Add the diluted buttermilk, mixing well as you do. Add salt.

Serve with warm rice and side dish of choice.

Kerala Parippu Curry / Kerala Yellow Dal Recipe

Ever had a Kerala sadya? If you have, then this parippu (dal) is the first thing you would mix with rice and ghee and feel the first flavour of what is essentially the essence of Kerala food. 

Kerala Parippu Curry Yellow Dal Recipe

Before you ask, of course we add coconut to our yellow dal, we wouldn't have it any other way for a dal recipe that's uniquely Malayali! For Kerala cooking, split yellow lentils / moong dal cherupayar, is more used than toor dal. Moong dal is also a very important ingredient in Ayurveda based cooking and is said to have a better effect on our health than most other kinds of lentils. 

Kerala Parippu Curry Yellow Dal Recipe

Kerala Parippu Curry Recipe
Serves 4

Ingredients:
1 cup moong dal / cherupayar / split yellow dal
A pinch of turmeric


Grind Together:
1/2 cup coconut (fresh or frozen, not dessicated)
1 tsp cumin seeds / jeera / jeerakam
2-3 shallots
2-3 green chillies

For Tempering:
1 tbsp coconut oil
1/4 tsp mustard seeds / kaduku
3 shallots, sliced
1 red chilli, torn into two
A few curry leaves

How I Made It:

1. Roast the dal in a dry skillet until it turns a light golden brown. I generally do this in bulk and store moong dal this way to prevent bugs. It also makes the dal much more fragrant after cooking.

2. Grind the coconut with the rest of the ingredients and some water into a smooth paste.

3. Pressure cook the moong dal with 4 cups water and a generous pinch of turmeric. Once done, mash well to a smooth paste. Keeping the flame on low, add the ground coconut mixture and some salt to the dal. Cook until well blended - about 5-8 mins.

4. Heat oil for tempering and add the ingredients in the order given. Once the mustard seeds have popped and the red chilly starts to glisten a deep red, remove from fire and dunk everything into the dal mixture. Mix well.

Kerala Parippu Curry Yellow Dal Recipe

Serve hot with steamed rice and ghee. 

This Kerala Parippu Curry goes to Kerala Kitchen hosted by Ria this month. 

Chena Vanpayar Erissery Recipe

I have been baking a lot lately and realising how much I enjoy it. But that doesn't mean I should give up on my roots and stop making these amazing Kerala recipes. Nothing can transport me back home virtually like a good Kerala sadya.

erissery

The last time I posted Erissery, I got a few comments asking for chena vanpayar erissery. Clearly, pumpkin is not a very favourite vegetable to most. But vanpayar is not easily available here and I couldn't find it in Mustafa Stores which practically means its non existent in Singapore.

DSC_0120

So I did what any self-respecting food lover cum food blogger would do. I brought a bag back from my last trip to Kottayam. So today, I can share the authentic Erissery recipe with you. Howzaaat?

DSC_0132

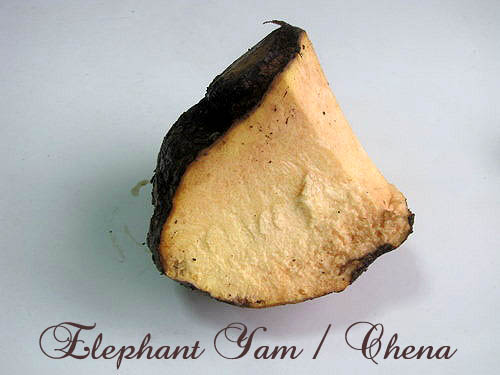
I absolutely love chena / elephant yam btw. If you are in Singapore and didn't know this yet, Mustafa stocks frozen cubed elephant yam now. No more buying a huge yam and wasting majority of it or trying to rub oil on your itching palms after cutting up a yam. Hooray!
Authentic Chena Vanpayar Erissery Recipe

Ingredients:
3 cups cubed elephant yam / chena
1 cup cow peas / vanpayar
Salt to taste

Grate together:
1/2 cup grated coconut (frozen will work but not dessicated)
1 tsp minced fresh garlic
1/4 tsp pepper powder
A large pinch of turmeric powder
1/4 tsp chilli powder

For tempering:
1/2 tsp mustard seeds
2 dry red chillies, torn into small pieces
A few curry leaves
1 tbsp coconut oil (anything else would make it taste less authentic!)

How I Made It:

1. Wash the vanpayar and sift out any stones that may be there. I found two decent-sized ones in my 1 cup of vanpayar. Transfer to a pan with 3 cups water and cook on a low fire until semi-soft. This will take about 20 mins or so. Add the yam to the vanpayar and cook until both turn soft and almost mushy. (I took the easy route and dunked everything into a pressure cooker and cooked for 2 whistles. The vanpayar was done perfectly but the yam became too soft. You can do this if you don't mind the consistency of erissery seen in the pictures)

2. Once the vanpayar and yam are cooked, add the grated coconut mixture and mix well, cooking on low flame until well combined and the coconut loses its raw smell - about 3-4 mins. Add salt. Mix again. Remove from fire.

3. Heat oil for tempering and add all the ingredients mentioned in the list. When the mustard seeds pop and the red chillies glisten, remove from fire and dunk into the cooked mixture. Mix well and serve hot with rice and moru curry.
DSC_0160-1

I've also made a variation of this dish without the coconut - Yam and Black Eyed Peas Curry without Coconut

Pacha Manga Chammanthi / Raw Mango Chutney

Q: What do you do when you pay $2.50 for one raw mango on a Sunday night?
A: Make chammanthi with it on the same night and take sparkly pictures with unnaturally high ISO and a tripod.

pacha manga chammanthi recipe

Or atleast, that's what I did.

Chammanthi is a Malayali's comfort food. Although it can be roughly translated to chutney in English, its not watery like chutney tends to be. Pacha Manga Chammanthi is almost always served with kanji or Indian congee, to balance the blandness but I served it with fresh, hot dosas!

Pacha Manga Chammanthi
Serves 4

Ingredients:
1/2 of a raw mango or about 1/2 cup peeled and chopped raw mango
3/4 cup grated coconut
3 green chillies
A small piece of ginger
1 shallot
2-3 curry leaves, optional
Salt to taste

How I Made It:

1. Grind the green chillies, coconut and mango pieces well together.

2. Add the ginger, shallot, curry leaves if using, and salt and pulse for a few seconds until well blended. I added a few drops of water to bring it all together.

pacha manga chammanthi recipe

Serve with kanji or dosa or rice and curry.

Notes:

- Its very hard to give a rigid recipe for chammanthi. The proportion of ingredients is always dependant on persona tastes
- For this chammanthi, adjust the ratio of coconut to mango according to the sourness of the mango and how sour you like your chammanthi
- You can omit the ginger, shallot or both if you want to keep the flavours more plain and focussed on just the mango. I sometimes omit the shallot but love the heat from the ginger
- Add a very small piece of tamarind if your mango is not sour at all. Then again, that mango is not best suited to make a chammanthi anyway

Coming soon: how to take pictures in the night with a point and shoot and no tripod, as part of the food photography series. Stay tuned!

Shamshad's Chicken Biriyani / Biryani Recipe

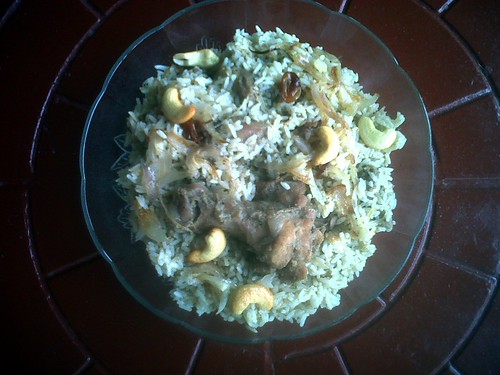
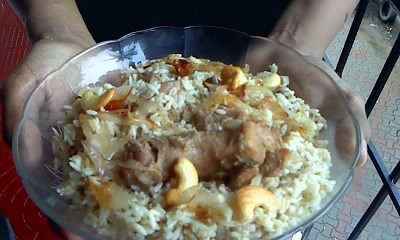
What better way to get back fully after a lazy break from blogging? Make someone else do the work. So here's a mild yet yummy and super easy Chicken Biriyani recipe shared by my friend Shamshad. She was very apologetic about the pictures but I have to say she did a mighty good job.

Thanks Sham!

Sham's Chicken Biryani

Chicken Biriyani Recipe
Adapted from Awesome Cuisine
Serves 4-6

Ingredients:
Basmati rice -  4 cups (soaked in water for 1 hour)
Chicken pieces - 1 kg
Onions - 3 large
Ginger garlic paste - 2 tbsp
Green chilies - 5 (or as per your requirement)
Pepper powder - to taste
Coriander powder - 3 tbsp
Garam masala - 1 tbsp
Cardamom - 4
Cinnamon - a 1" piece
Cloves - 4
Salt to taste

To Marinate
Pepper powder -to taste
Coriander powder - 3 tbsp
Garam masala - 1/4 tsp
Salt to taste

For Seasoning
Ghee - 2 tbsp
Cashew nuts - 15 or so
Raisins - 10 or so
1 large onion

Method:

1. Chicken
Wash Chicken pieces. Marinate for atleast an hour with coriander powder, pepper powder, garam masala powder and salt.
Semi fry chicken pieces in a pan with little oil.

Heat oil and add onions and the ginger garlic paste. When it turns brown, add green chilies (cut into small pieces). Add coriander powder, pepper powder, garam masala powder and salt.

When it is done, add chicken pieces. Keep it for 5-10 mts till it is half cooked. In between you can turn the pieces so that it is heated equally.

Cook in pressure cooker with about 1/2 cup water. Normally 4 whistles.

Biriyani Rice
Put 2tsp ghee in the pan used to fry the chicken. Add cardamom+cloves+cinnamon.
After 2 mins, add the soaked rice. Stir well for 5 mins, else it will stick to the pan. Add the rest of the main ingredients and cook in a pressure cooker with 6 cups water (the ratio of rice:water should be 1:1.5) - normally 3 whistles for basmati rice.

Once done, mix the cooked rice and chicken.

Seasoning
Put ghee in a pan. Add onion (cut lengthwise very thin), cashew nuts and raisins. When it turns light
brown, remove and garnish the biriyani


Sham's Chicken Biryani

Serve hot with papad and raita.

Vazhakka Pulissery Recipe

This is probably not an authentic Kerala Pulissery recipe for a couple of reasons. In the traditional pulissery recipes, I don't see the addition of coriander seeds. Also, the vegetable or fruit of choice is usually ripe mangoes, ethappazham, or raw mangoes for a sweet and sour pulissery. In this pulissery recipe, Seetha aunty, a relative of ours in Singapore, has used vazhakka (raw bananas) and winter melon (poosanikkai).

We go over to her place now and then for dinner and this pulissery was one made as an accompaniment to adai. It was a gorgeous combination and I loved it so much that she packed up the remaining pulissery and I brought it home with me!

Pulissery Recipe

Vazhakka Pulissery Recipe
Serves: 2 to 4

Ingredients:

1 cup cubed vazhakka / raw banana
(You can use ripe mango or green mango according to your preference of wanting sour pulissery or sweet and sour pulissery.)
1/2 cup cubed winter melon / pooshanikkai
1/2 cup grated coconut
2 green chillies
1 cup thick curd / yogurt
1 tsp coriander seeds / malli / dhania
1/4 tsp mustard seeds  / kaduku
1/4 tsp fengureek seed / menthayam / uluva
A few curry leaves
2 dry red chillies
1/2 tsp grated jaggery(optional)

How to Make:

1. Cook the banana and the winter melon in a pan with little water, salt and turmeric.

2. Meanwhile, grind the coconut, green chillies and coriander seeds with 2 tablespoons of curd to a fine paste.
Add this to the cooked vegetables and let it come to boil. Cook on low fire for 3-5 mins.

3. Add the rest of the curd beaten with a spoon. Turn off when the mixture is just reaching boiling point.

4. For tempering, heat 2 tsp oil in a pan. Add the mustard seeds, fengureek seeds, red chillies and curry leaves. When the mustard seeds start to pop, add to the gravy. Adding jaggery enhances the taste so do add it if you have some in hand.

Pulissery Recipe

Huge thanks to Seetha aunty for the lovely dinner and for this fantastic pulissery recipe.

Cheera Thoran / Stir Fried Spinach Recipe

Before one more person asks me for the recipe of this pic I featured in my taking food pictures on Portrait mode, I am going to post it.

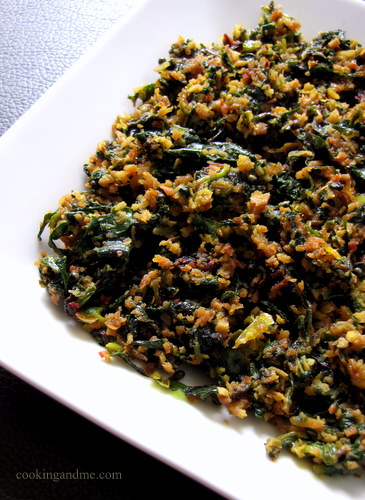
Cheera Thoran / Spinach Stir Fried Recipe

Cheera thoran is a very simple and nutritious recipe, perfect for a weeknight if you are looking for a side-dish for your dal chawal, or sambar rice, or even curd rice. I love spinach and considering the abundance of spinach and most other greens in Singapore, this is a real treat for us!

Cheera Thoran Recipe
Serves 2 to 4

Ingredients:
5 cups tightly packed chopped spinach leaves (a bunch)
1 cup grated coconut
4 shallots (or half of an onion)
2-4 green chillies
A pinch of turmeric powder
1/2 tsp jeera
2 tsp oil (I always use coconut oil for thoran)
1/4 tsp mustard seeds
A few curry leaves (optional)
1 dry red chilly, torn into half
Salt to taste

How I Made It:

1. Clean and chop the spinach fine. Drain well and set aside.

2. Grind together - coconut, shallots, green chillies, jeera and turmeric. If you don't have a mixie, use a pestle and mortar to bring these ingredients together. If you don't have that, then just finely chop the shallots and green chillies and mix well with the rest.

3. Heat the oil in a pan and thrown in the mustard seeds. When they pop, add the curry leaves and the halved red chilly. Fry for 10 seconds and add the coconut mixture. Fry that for 30 seconds and add the chopped spinach with some salt.

4. The spinach will give out water so cook well until all the water evaporates and you have a dry dish (about 5-7 mins)

Cheera Thoran Spinach Stir Fried Recipe

Serve with rice and dal, rice and sambar or rice and moru curry.

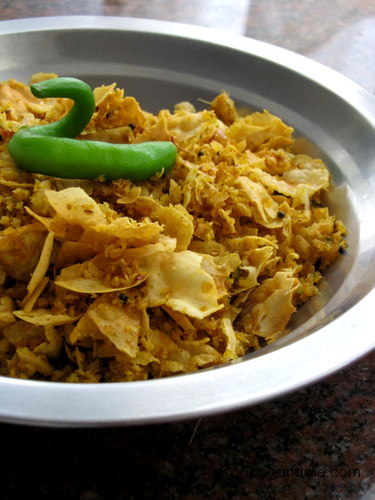
Pappadam / Papadom Thoran Recipe

A very simple thoran recipe from Kerala but what makes this special is the fact that Amma made this for me, especially to post on the blog, the day she returned from the hospital after her knee replacement surgery.  The recipe is from Ponnamma, the maid who took care of amma in the hospital. Amma is very adamant, didn't listen to any of us saying she should rest, and went and made this, partially sitting on a chair in the kitchen.

This post is dedicated to her and all other mothers who selflessly love their children.

Pappadam Thoran

Pappadam / Papadom Thoran
Serves: 2

Ingredients:
10 pappadam, cut into squares (use clean kitchen scissors)
3 tbsp oil
1/4 tsp mustard seeds
1/2 tsp urad dal / uzhunnu parippu / ulutham paruppu
1/2 tsp jeera
2 cloves garlic
1/2" piece ginger
1/2 red chilli powder
2 green chillies (adjust to taste)
4 tbsp grated coconut
A few curry leaves
Salt, only if needed

How to Prepare:

1. Heat the oil in a pan and fry the pappadam pieces. Drain and set aside on a kitchen towel.

2. If there's too much oil left, remove some. About 1-2 tsp oil is enough for the rest of the preparation. Add mustard seeds and urad dal to the hot oil. When the mustard seeds pop, add the jeera and the ginger and garlic (crushed together in a pestle and mortar or in a small mixie jar).

3. When the ginger-garlic paste is fried (about 2 mins), add the curry leaves, chilli powder, and the green chillies along with the coconut. Mix well and add the pappadam pieces.

4. Mix again for about a minute, test for salt and add only if needed. The pappadams should be salty enough.

Serve hot and fresh with rice and moru kaachiyathu / curry of choice. If you keep it longer, the papads get soft, but not soggy. Still tasty but I highly recommend that you eat it when still hot and crisp.

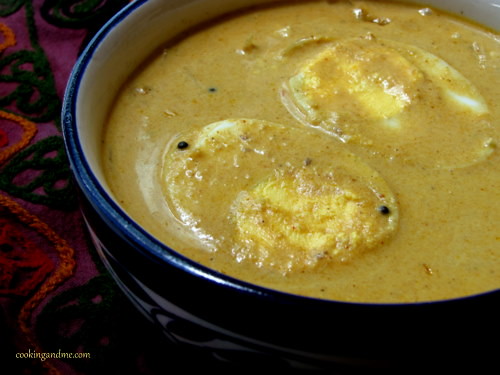
Malabar Egg Curry / Egg Curry in Coconut Milk

Whenever I make egg curry, its usually the Kerala-Style Egg Roast. Its easy and goes with rotis, rice or even dosa. Recently when I made appam, I had the craving to have egg curry with coconut milk, the sweet and spicy curry of my childhood. Using store-bought coconut milk significantly alters the taste of this so use freshly squeezed coconut milk if you have time in hand.

This recipe is my own version of the popular Malabar Egg Curry. Don't be mean if it doesn't go with what you have in mind.

Malabar Egg Curry in Coconut Milk Recipe

Malabar-Style Egg Curry
Serves: 2

Ingredients:
3 eggs, boiled, shelled and cut into halves
2 large onions, sliced
1 cup thick coconut milk (onnaam paal)
1 cup thin coconut milk (rendaam paal or 1/2 cup store-bought coconut milk + 1/2 cup water)
1 tsp ginger garlic paste
1 tsp red chilli powder
1 tbsp coriander powder
A pinch of turmeric
1 tsp garam masala (or pound/grind together 2 cloves, 1 small piece cinnamon and 1 cardamom)
Salt to taste

To temper:
2 tsp coconut oil (or any oil)
1/4 tsp mustard seeds
1/4 tsp jeera / jeerakam
A few curry leaves

How I Made It:

1. Boil eggs, shell them, cut into halves and set aside.

2. Heat oil in a pan and add the ingredients to temper. When the mustard seeds pop, add the sliced onions and fry until they turn golden brown.

3. Then add the chilli powder, coriander powder, garam masala (or masala mix) and turmeric and fry for 30 seconds. Add the ginger garlic paste and fry for another minute or so.

4. Add the thin coconut milk and reduce flame to flow. Bring to boil and let it cook for about 2-3 mins, stirring occasionally.

5. Keeping fire on low, add the thick coconut milk and the eggs. Add salt, bring to just one boil and remove from fire. If you boil too much, the coconut milk will curdle so be careful.

Enjoy warm with rotis, rice, appam or puttu.

Ethakka Appam / Pazham Pori / Banana Fritters - A Kerala Snack Recipe

Ethakka appam / pazham pori, whatever its called, holds a special place in the cuisine of Kerala. Its a quintessential Malayali snack and you get to buy it in every restaurant, roadside snack carts, trains, hostel canteens, college cafes, you name it!
Ethakka Appam Recipe

Yes, its deep friend, yes, its coated in all purpose flour, but its worth it and I want you to take my word on this.

Ethakka Appam Recipe

The bananas used for Ethakka Appam is Ethappazham (the raw version of which, Ethakka, is used to make the famous Kerala banana chips!). It won't taste the same or as good if you use any other kind of banana. Its also called Nenthram Pazham but I can't seem to find a more representative English translation for Nenthram pazham except plaintain.

On to the how-to now.

Ethakka Appam / Pazham Pori Recipe
Serves 2 : About 8-10 pieces

Ingredients
1 Ethapazham / Nentham pazham / Ripe plaintain (the riper and blacker the skin, the better)
1 cup all purpose flour or maida
1 tsp sugar
1/4 tsp baking soda
1/2 salt
A pinch of turmeric powder
About 3/4 cup water (more or less)
Coconut oil to deep fry

How I Made It:

Ethakka Appam

1. Place the flour in a wide bowl.

Ethakka Appam Recipe

2. Add sugar, salt and baking soda. I used brown sugar but white sugar works perfect too.

Ethakka Appam Recipe

3. Add about 1/2 cup water and adjust as you go, to make a batter that's slightly more watery than dosa batter. It shouldn't be too thin, otherwise, the appams will be too oily.

Ethakka Appam Recipe

4. Add in a pinch of turmeric powder. This is only meant for the colour bit and doesn't change the taste or flavour in any way.

Some people add jeera to ethakka appam. I personally don't like biting into them but feel free to add it in if you want.

Ethakka Appam Recipe

5. Cut the plaintain into half and then slice each half midway vertically. Further slice each of the quarters into 2-3 thin pieces. Dunk these into the batter.

Ethakka Appam Recipe

6. Heat the coconut oil until its all bubbly. You have to use coconut oil for the authentic taste. Anything else is a blasphemy so don't tell me if you used vegetable oil or *shudder* olive oil.

I used a super small kadai so that I need only very little oil and that reduces wastage.

Ethakka Appam Recipe

7. When the oil is just short of smoking hot, add in the banana pieces coated with the batter.

Ethakka Appam Frying

8. Fry until golden brown and drain on paper napkins.

Ethakka Appam Kerala Banana Fritters

9. Serve warm with tea.

The appams get soggy and the coating gets chewy and soft once cold so this is best served warm. But when I was a kid, I used to wait till it got cold and chewy :)
Beans Mezhukkupuratti / Stir Fried French Beans Recipe

What do you get when you lightly fry up any chopped vegetable and a paste of shallots and garlic in some oil and  add salt and some chilly powder? Mezhukkupuratti! Its a quintessential Kerala side dish, often made to complement a gravy that's coconut-rich (is it wrong that my mouth is watering as I type this?).

Anyway, this beans mezhukkupuratti is not just any mezhukkupuratti. This is Pennamma chechy's recipe. Pennamma chechy was my best friend's maid. Yeah, I will give you a minute to figure that out.

Ok so, Deepa, my BFF, had a maid called Pennamma chechy, a typical Catholic lady who cooked amazing Kerala food and each time I eat at Deepa's place, there's always mezhukkupuratti and its always always yummy. Once I asked her for the recipe and since then, I have never made mezhukkupuratti any other way.

Beans Mezhukkupuratti / Stir Fry II

Beans Mezhukkupuratti
Serves: 2

Ingredients:
1 cup French beans, cut into 1/2" pieces
1 small onion, thinly sliced (optional)
8-10 shallots
2 cloves of garlic
1 tsp red chilli powder
1/4 tsp jeera / jeerakam
1 tbsp oil
1/2 tsp mustard seeds
A pinch of turmeric
A few curry leaves
Salt to taste

How I Made It:

1. Heat oil and add the mustard seeds and jeera. When the seeds pop, add the onions (if using), beans and the curry leaves.

2. Lower fire to sim and stir fry the beans until almost cooked. This will take about 12-15 minutes.

3. Grind the shallots and garlic with the turmeric powder and add to the cooked beans. Increase the heat a bit and fry, stirring well, until the shallot-garlic paste is golden brown.

4. Add salt and chilly powder. Fry for another minute.

Beans Mezhukkupuratti / Stir Fry

Serve hot with steamed rice and any coconut based gravy, like thella pulusu or theeyal.

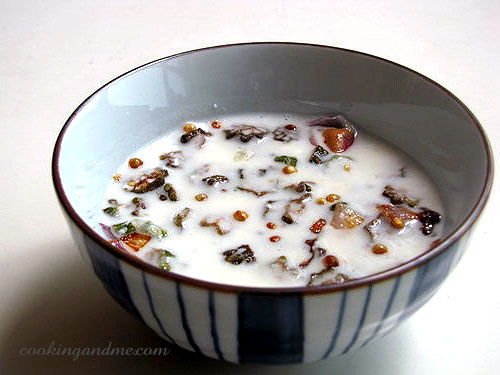
Vendakka Thayir Pachadi / Okra Curd Pachadi Recipe

I had forgotten how easy and quick it is to put together a thayir pachadi and call it a side dish. Now that summer has officially set in in Singapore (its technically summer here throughout the year!), our consumption of buttermilk and curd has gone up significantly - as if TH wasn't guzzling down enough of it already.


Pachadi, especially vendakka pachadi is a very common part of a sadya or wedding meal. Its simplicity balances out the heat of the other curries and side dishes that are seen as more important. I have always had a soft corner for the simple pachadi.

Vendakka Thayir Pachadi
Serves 2

What I Used:

10 vendakka / okra
1 small onion
1 tsp oil
1/4 tsp mustard seeds
1/4 tsp roasted jeera / cumin
1 green chilli (or to taste)
1 cup thick plain yogurt
1/4 to 1/2 cup water
Salt to taste

How I Made It:

1. Cut the okra into thin rounds. Chop the onion finely and the green chilli into small pieces (or crush using a pestle and mortar).


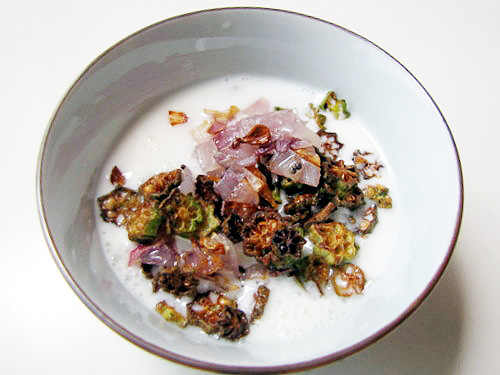
2. Heat oil, add mustard seeds and when they pop, add the onions, green chilli and okra. Fry for 8-10 mins until the onions are golden and the okra is fried and crisp. Drain and leave aside to cool.

3. Beat yogurt with salt and jeera. Dunk in the fried okra mixture and mix well.


Serve with rice and side dish / kozhambu.


This goes to JFI - Wedding Treats hosted by Priya of Akshayapaatram, originally conceived by Indira of Mahanandi.

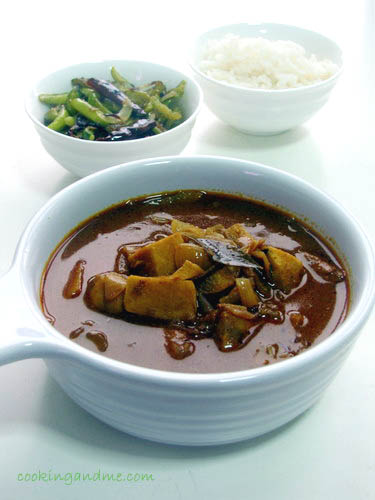
Chena Ulli Theeyal / Theeyal Recipe With Elephant Yam and Shallots

Theeyal is a typical Kerala curry that goes well with rice and any side dish. I can have theeyal with practically anything though - idli, dosa, or even appam and idiyappam. I don't make Kerala recipes that often, especially kozhambu recipes because TH prefers the tamil kozhambu dishes.


But, when I got a fresh piece of Chena from Little India, I absolutely had to make theeyal so that's how this happened.

Chena is a pretty popular Kerala ingredient and I love almost anything made with it. Its hard to get fresh chena in Singapore and usually the ones I see are huge and unlike back home, you can't buy just 250gm by cutting off a chunk. You either take the whole thing or don't.


Shallots or ulli, are another star in Kerala cuisine. Its mostly crushed and added to dishes or added whole in gravies like theeyal. Its a pain to peel but for theeyal, I 'd go the extra mile any day!


Ulli theeyal is the most common kind of theeyal although pavakka (bitter gourd) theeyal, kathrikka (brinjal) theeyal and some others are pretty popoular too. I added chena for the extra kick.

Chena Ulli Theeyal
Serves 4

What I Used:

1 cup elephant yam / chena, cut into small cubes
1 cup shallots
1/3 cup tamarind juice (soak tamarind in warm water, extract juice, discard pulp)
Salt to taste

To roast and grind:
1 cup grated coconut (fresh or frozen)
1.5 tbsp coriander powder / malli podi
1/2 tsp  jeera / jeerakam / cumin Powder
1 tsp chilli powder (or to taste)
1/2 tsp pepper powder
A pinch of turmeric powder
A pinch of hing / kaayam / asafoetida
1 tsp oil

For tempering:
1/4 tsp mustard seeds
A few fenugreek seeds / uluva
2 dry red chillies
A few curry leaves
2 tsp (coconut) oil

How I Made It:

1. Heat oil for roasting the powders. Add coconut first and roast until dark brown (a minute short of burning). Then add all the powders, fry for another 10 seconds or so and remove from fire. Cool and grind first to a coarse powder and then add some water and grind to a smooth paste.

2. In a kadai, add the tamarind juice + 1 cup water, shallots and the yam. Bring to boil and add the ground masala paste. Simmer for 10-15 mins until desired consistency is achieved. I like this on the thicker side so I boil until its fairly thick but you can stop after 10 mins or so if you prefer. Add salt and mix well. Remove from fire.

3. Heat oil for tempering and add all the ingredients. Make sure that the fenugreek seeds don't burn, it will turn the curry bitter. When the mustard seeds pop, you can dunk it into the curry. Mix well.


Serve with warm rice and any side dish. I served it with rice and kovakka mezhukkupuratti.

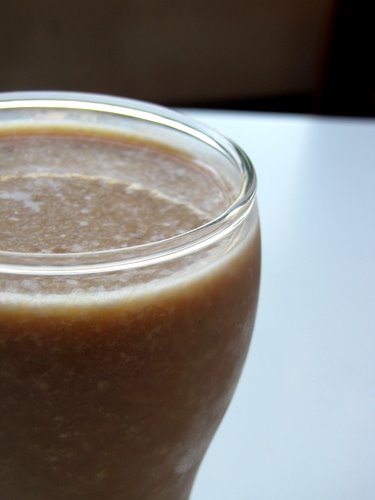
Sharjah Shake: Step by Step Recipe

Sharjah shakes were all the rage when I was in college. Although it feels like just yesterday that I was in college, sadly, its been a while.

That's the time when milk shake parlors sprang up all over town and people of all ages dropped by for a quick relief from the heat and humidity that's almost always present in Kerala.

Amma and I have shared countless number of sharjah shakes in these parlors during our almost-everyday town visits, leaving with a full stomach and numb tongues. Ah, the good old days.

As if having a Sharjah shake almost every time we stepped out of the house wasn't enough, we used to make it at home too. "Packet milk" was bought and chilled especially for this purpose as the milk we used normally came from a neighbour with a cow (this milk was boiled in a milk cooker, cream extracted and stored away for churning butter that would later be made into ghee.. phew!)

Back to Sharjah Shake. Here's how we used to make it. I am sure there are countless variations out there trying to mimic the milk shake parlour versions. This is ours and its very flexible.

Sharjah Shake Recipe
Serves 2

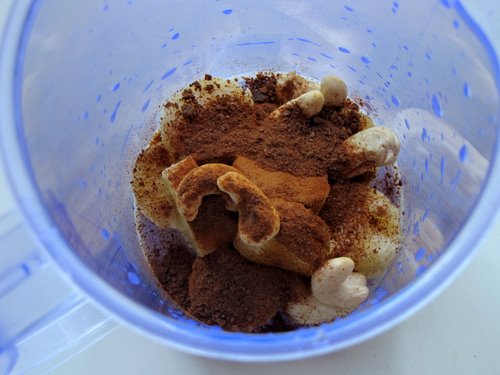
1. Chop up one ripe banana straight into your blender.


2. Throw in 4-5 whole raw cashewnuts or almonds.


3. Add 1 tbsp bournvita / maltova / chocolate horlicks / ovaltine to this. We have tried even regular horlicks and that tastes good too.


4. Top up with about 2 cups frozen chunks of milk. I used chilled milk here because I was having this for breakfast. To get the authentic milk shake parlour version, freeze milk (in ice trays if you can) and break it up with a strong knife into chunks and then add it in. This will give a crushed ice texture to the drink. Also, using whole milk will enhance the taste (but of course!).


5. Pour and... go on! Bottoms Up!


Note:

Adding sugar is optional since the chocolate drink powder and banana will lend some sweetness to the drink. You can add one date or 2tsp honey if you like the flavour. We usually stick with sugar if needed but taste first.

This goes to the "Serve me Some…Juices, Shakes, Smoothies" event at Cook Curry Nook.

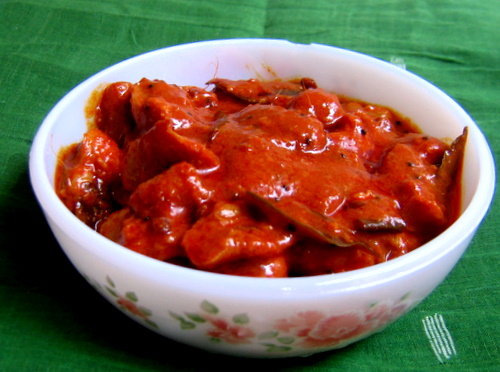
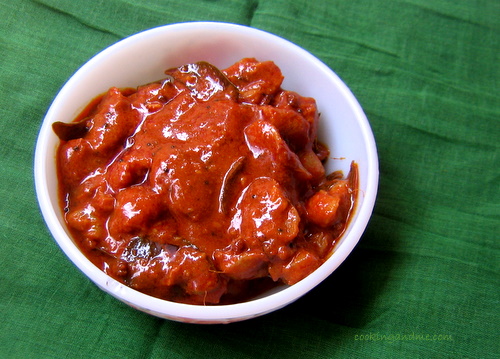
Chambakka Achaar Recipe / Pickled Water Rose Apple

This is my first pickle recipe but the thing is, I didn't make this! The fact is, ever since I moved out of Kottayam for job and later marriage, I have always been given jarfuls of pickles and podis. Neither TH nor I eat too much pickle and usually stick with having kozhambu with curd rice, rather than, say, mango pickle. Weird, but true.

When amma was here last month I told her this and said I need to get some of her pickle recipes. My favourite is the sweet mango pickle (which will be posted very soon) which she made for me when she was here.
Chambakka 
Thanks to Sig for letting me use this picture!

On to the chambakka achaar now. I did a search to see what chambakka is called in English. I used to call it rose apple after I checked with my Biology teacher when I was in school, but this was before the days of the Internet so I had to verify if she was right. Looks like the right term is water rose apple so she wasn't totally off!

This recipe is special for a couple of reasons. It came from amma (translated and emailed by my fave uncle, Radha Mama), which is reason enough, but she actually made it, put some in her 'pretty bowl', got my brother's dear friend Rajesh Anna to click pics and he then emailed it to me. There were about 8 pics, all in different angles, in true food blogger style!


Chambakka Achar Recipe : Pickled Water Rose Apple Recipe

What's Needed:


Chambakka - 250gm
Chilly powder - 3 tbsp
Asafoetida / Hing / Perungaayam - 1/4 tsp  
Fenugreek seeds / menthayam / uluba - 1/4 tsp
Turmeric powder - 1/4 tsp
Oil - 4 tbsp
Mustard seeds / kaduku - 1/4 tsp
A few curry leaves
Salt to taste

How Its Made:

1. Wash the rose apples thoroughly. Cut into halves, de-seed and set aside.

2. Heat oil in a pan and add mustard seeds. Once the seeds pop, add the fenugreek seeds and fry lightly until fragrant and the colour starts to change. (Make sure you don't over do this otherwise the pickle will turn too bitter. )

3. Add the rose apples next with some salt. Saute lightly until the colour starts to lighten and its cooked more than half way through (about 7-10 mins).

4. To this, add the chilly powder, hing, turmeric powder and the curry leaves and mix well, frying lightly for another 5 mins or so on low heat.

5. Store in a clean, dry jar and use after 2 days for best results.

This pickle doesn't keep for too long so refrigerate within 4 days and use within 2 weeks.


HUGE thanks to amma, radha mama and Rajesh anna for making this first pickle post on Edible Garden possible :)