Showing posts with label Snacks Wraps and Appetizers. Show all posts

Green Mint Chutney & Cheese Sandwiches

Picnic food is fun to make, especially if you are not really going on a picnic but just pretending to on a rainy, weary weeknight.

About once a month, TH and I have sandwiches for dinner. Its just one of those inexplicable things we do.

DSC_2430

Since I got my mint plant, there's no dearth of fresh mint and I love using fresh herbs in my cooking. Well, don't we all?

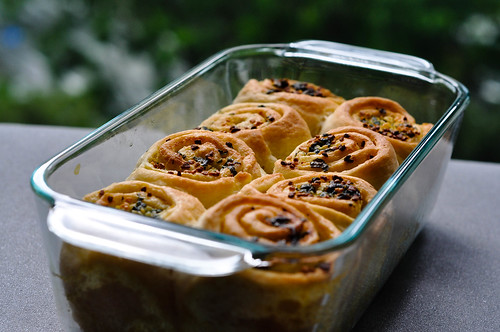
This is a quick sandwich recipe that works great for a picnic, tiffin box or even brunch or tea party. It tastes great and is filling too!

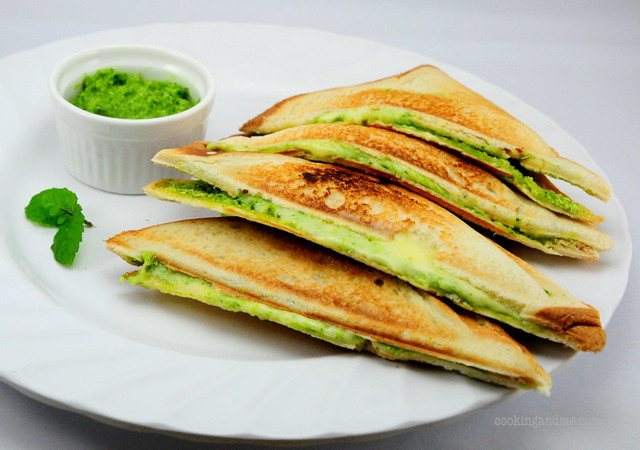
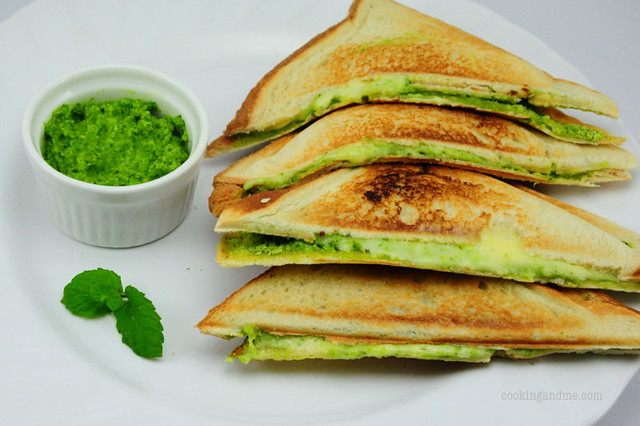
Mint Chutney and Cheese Sandwiches
Makes 4 - Serves 2

Ingredients:
8 slices of bread of your choice
4 slices of cheese

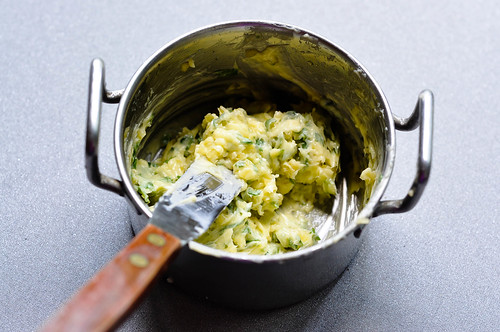
For the Mint Chutney:
A bunch of fresh mint leaves
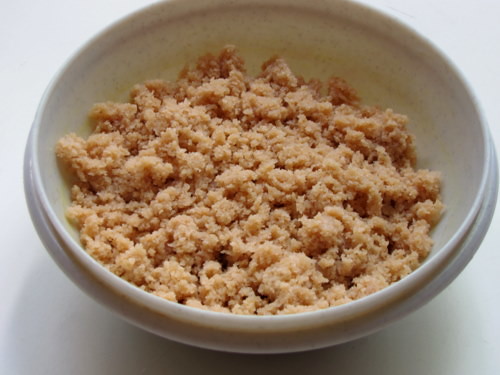
1/2 cup freshly grated coconut
1 green chilly
1/2 tsp minced garlic (optional)
A pinch of dry ginger powder or 1/2" piece of fresh ginger
Salt to taste

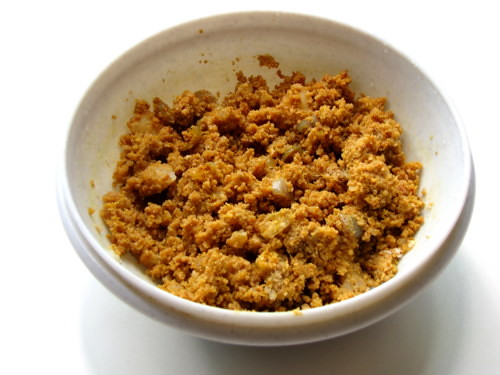
Grind all ingredients together with very little water to a smooth paste.

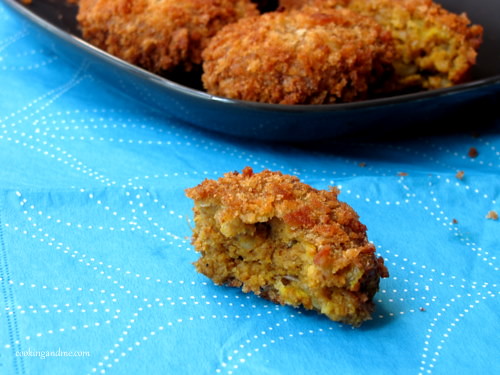
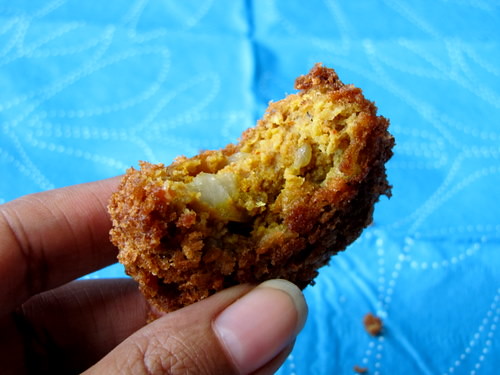
To assemble and toast the sandwiches: Spread a generous amount of the mint chutney on one side of the bread slice. Top with a slice of cheese and toast in a sandwich maker until done. You can also toast in a pan on the stovetop with a pat of butter until both sides are golden brown and the cheese has melted.

DSC_2440

Serve hot with ketchup.

Garlic Pull-Apart Rolls Recipe - Step by Step

I had been eyeing this recipe of Suhaina's for a long time. When she brought them for our Singapore food bloggers' meet, I was totally sold. Finally managed to make them this weekend. I would highly recommend this to all those who are dying to bake but fear the yeast monster. Trust me when I say this is really fool-proof and you can feel so proud of yourself when done!

Eggless Garlic Rolls Recipe

I halved the recipe and got 8 mini rolls, enough to serve 2 very generously. We had one here and one there, through the weekend.

Garlic Pull-Apart Rolls
Recipe source: Suhaina
Makes 8 mini rolls

Ingredients:
Plain Flour - 1.5 cups
Warm Water- 1/2 cup + 1 tbsp
Yeast - 1/2 tbsp
Salt - 1tsp
Sugar - 1 tbsp
Olive Oil - 1 tbsp + 1 tsp

For Garlic Spread:
Salted butter, at room temperature - 6 tbsp
Minced garlic - 2 tbsp
Chopped coriander leaves - 2 tbsp

How I Made It:

1. Mix flour, yeast, warm water, salt and sugar together until you get a smooth, slightly stick dough.

Eggless Garlic Rolls Recipe

2. Add oil to your fingertips and knead until the dough springs back when you press with your fingers - about 4-5 mins.

Eggless Garlic Rolls Recipe

3. Wrap in cling film and allow to double by keeping in a warm place for about 45 mins. Meanwhile, make the garlic spread by simpy mixing all the ingredients.

Eggless Garlic Rolls Recipe

4. Grease a baking pan or loaf tin with olive oil. I used my Pyrex loaf pan which was the perfect size for 8 mini garlic rolls.

5. Knock down the air in the dough and divide the dough into two equal portions.

Eggless Garlic Rolls Recipe

6. Transfer one portion of the dough to a floured surface and roll gently into a rough rectangle of 1/2" thickness. Apply more flour sparingly if sticky.

7. Spread about 2 tbsp of garlic spread on one side.

Eggless Garlic Rolls Recipe

8. Roll from one end gently and firmly.

Eggless Garlic Rolls Recipe

9. Cut into half and then each half again into two halves to get 4 equal portions.

Eggless Garlic Rolls Recipe

10. Now place the rolls with the cut side up in the greased pan.
Repeat the same procedure for the remaining dough.

11. Spread a little milk on the rolls and add the remaining garlic spread on top. I am sure sesame seeds as Suhaina has added will make the flavour even better but I didn't have any.

Eggless Garlic Rolls Recipe

12. Allow to rise for another 20 minutes. In the mean time preheat the oven to 180C / 375F.

13. Bake for about 30 mins until the top is golden brown. My Pyrex glass pan usually takes longer to bake in, so mine took about 35 mins to bake just right.

Eggless Garlic Rolls Recipe

These are really really soft and have an amazing flavour. Serve fresh and hot!

Eggless Garlic Rolls Recipe

Suhaina's Notes:

1. The amount of water depends on the type of flour you are using. Use your judgment to get a slightly sticky dough that behaves when you apply oil.

2. The amount of yeast can be reduced if you don't like the flavour of yeast too much in your breads. You can add just 1 tsp and let it double over a couple of hours, slowly.

Dahi Ke Kabab Recipe + Winners

I have an absolutely brilliant banana cake recipe I want to share with you but I am not happy with how the pictures have turned out. This is the first time I feel like I shouldn't share an okay picture because the recipe is that fabulous and I don't want even one single person to look at the picture and go, "ah looks meh, I am not going to try this" because they are missing out on a LOT.

Phew, talk about passion and banana cake recipe.

Moving on, here's a really nice snack recipe that I flicked from Nita Mehta's Taste of Amritsar (I think). I saw the book in the library and mentally jotted down the recipe. I made it out of memory so forgive if there's something missing as far as authenticity goes. I don't know this cuisine well at all.

IMG_4649

They turned out really really fab. She had also given the recipe for a hot and sweet onion chutney (which I have slathered on the kebabs) and the combination was really mind blowing. Everything comes together in about 30 mins and its this long only because you need hung curd for the recipe.

IMG_4633

The batter needs to be really thick because you are going to shape them and deep fry them. It will be a bit sticky so use wet hands to shape the kebabs.

IMG_4640

Dahi Ke Kabab with Onion Chutney
Source: Nita Mehta
Makes about 12

Ingredients

For the Kababs:
1 cup hung curd (take about 1.5 cups curd in a muslin cloth and hang over the sink for atleast 2 hours)
1/2 cup besan
1/2 tsp chilli powder
1/2 tsp ground black pepper
2 pods green cardamom, powdered
2 cloves, powdered
A pinch of powdered cinnamon (optional, I didn't add any)
Salt to taste

For the Chutney:
1 large onion, sliced thin
1 green cardamom, crushed
2 dry red chilly
1 clove of garlic
A pinch of hing / asafoetida
2 tsp oil
Salt to taste

How I Made It:


For the Kababs

1. Hang the curd as mentioned for atleast 2 hours until you get a thick, sticky resulting mixture. To this, add the rest of the ingredients to make a thick paste-like batter. Don't add any water - if you find the mixture too thick, add milk by the tsp and if you find it too thin, add besan by the tsp.

2. Heat oil until almost smoking, shape dough into small, flat kebabs and deep fry until golden brown on both sides. Serve immediately with the onion chutney.

For Chutney (I recommend making this first since the kababs have to be served HOT)

- Heat oil and saute onions until golden brown. Add the chilly, salt, crushed cardamom, hing and garlic, give it a stir before removing from fire.

- Cool and grind to a smooth paste without water.

IMG_4675

PS: The measurements and ingredients given in this recipe are approximate so please adjust to your own taste.

PPS: The pictures in this post were taken with my old camera - Canon SX10 IS :)

---------------------------------------------
Now, for the winners of the window-sill mushrooms giveaway. I wrote all names on a piece of paper since there weren't very many and made TH draw the lots. The lucky ones are -

- Anupama Gobalan &
- Erin Neu

Congratulations guys and I hope you share pics of your wonderful mushroom plant and dishes you make with them :)

Masala Vada / Masala Vade Recipe

I am so tempted to claim this is the authentic Andhra masala vada recipe. I am this close to actually doing it, but the truth of the matter is, I am not sure if it is. I checked a few sites that have Andhra recipes and all of them give many different variations to the masala vada recipe and now, I just don't know.
Masala Vade Recipe

But, that doesn't take away from the deliciousness of this crunchy snack that I served with rice, melted ghee, Gongura Pachadi and Gongura Adugula Pappu. We definitely had a good Andhra meal that day for lunch!

Andhra Masala Vada Recipe
Makes 12-15 small vadas

Ingredients:
1 cup channa dal / kadala paruppu / Bengal gram
A few shallots or 1 small onion, chopped fine
1/2 tsp jeera / cumin seeds
3 green chillies, cut into thin circles
1" piece of ginger, grated
2 pods of garlic, minced
1/2 tsp garam masala powder
A few curry leaves (I added lots!)
Salt to taste
Oil

How I Made It:

Soak channa dal for atleast 2 hours. Drain and grind to a coarse mixture with all other ingredients. I leave some whole dal out while grinding and then add them on to the mixture before shaping, so that there's a bite in the vada. Make sure you add as little water as possible, in fact, a few drops should be sufficient, if at all you need it.

Shape into small discs and deep fry. I made these in the paniyaram pan that I use for pakoda and other fried goodies.

Masala Vade Recipe

I really should make simple thaalis like this more often!

Golden Onion Mushroom Quiche Recipe

This month's 'A Sweet Punch', although not sweet, came out fantastic! This is another one of those why-on-earth-did-I-ever-think-of-making-these kinda recipes.

I would highly recommend this golden onion mushroom quiche recipe to beginner bakers. You know why? Its going to make you feel awesome and so much more confident because its practically no-fail.

Golden Onion Mushroom Quiche Recipe

Golden Onion Mushroom Quiche Recipe
Makes 8 generous wedges and 4 mini quiches

Ingredients

For the pastry:
1 cup + 2tbsp flour (200gm)
100gm unsalted butter, frozen
1/4 tsp baking powder
1 beaten egg
A generous pinch of salt

For the filling:
2 cups chopped mushrooms (I used button mushrooms)
1 large onion, chopped
1/2 cup milk
3/4 cup shredded cheddar cheese
2 beaten eggs
Freshly ground pepper
Salt to taste
1 tbsp oil


How I Made It:

For the pastry:

Golden Onion Mushroom Quiche Recipe

Mix flour, salt and baking powder together. Ideally, you should sieve this. Ideally. Grate the frozen butter and mix it well with fingertips until the mixture resembles coarse sand.

Sidenote: I would recommend grating the butter only if you have someone to outsource the washing of the said grater. If not, just cut the butter into cubes and follow this process.

Golden Onion Mushroom Quiche Recipe

Add the egg and bring the dough together. You can add a few drops of ice cold water if needed at this stage, but I didn't have to. Transfer the dough to a floured surface.

Golden Onion Mushroom Quiche Recipe

Roll it out about 1/2" thick. Its fine even if its not an even circle or whatever. Just make sure the thickness is more or less even all around.

Golden Onion Mushroom Quiche Recipe

Next step is to gently transfer this to a greased pie dish. Here's what I used. I bought this pie dish ages ago anticipating this exact moment! Well, not really, but atleast it was put to good use after 7 months of buying it.

Golden Onion Mushroom Quiche Recipe

Gently lift the rolled out dough and lay it over the dish. Press it down lightly at the bottom and along the sides. If there's a gap somewhere, just take the overhanging dough fromt he sides and patch it up. Go on, nobody needs to know. I did it along the top and left hand side, can you tell? Of course you can, but, it doesn't matter. That's the beauty of a quiche.

Refrigerate this crust while you put together the filling.

Pre-heat the oven to 350F / 180C.

To prepare the filling:


Heat the oil in a pan and fry the onions until golden brown. Add the mushrooms and saute until soft and all the water has evaporated from the pan. Top off with ground pepper and salt and mix well. Cool completely.

Golden Onion Mushroom Quiche Recipe

Break 2 eggs into a bowl and beat lightly. I know there are three in there but I ended up with a lot of extra filling and I really don't want you to waste good ingredients. So stay with me here, ok? Only 2 eggs needed.

Golden Onion Mushroom Quiche Recipe

Add 1/2 a cup milk to the eggs.

Golden Onion Mushroom Quiche Recipe

And top off with about 3/4 cup of shredded cheddar cheese. Mix well.

To assemble and bake:

Golden Onion Mushroom Quiche Recipe

Bring out the prepared crust from the fridge.

Golden Onion Mushroom Quiche Recipe

Lay the onion mushroom mixture evenly on it.

Golden Onion Mushroom Quiche Recipe

And top off with the milk-egg-cheese mixture until it reaches almost up to the top of the crust.

Golden Onion Mushroom Quiche Recipe

Bake until the top turns golden brown and patchy in parts and the crust turns golden - about 25 to 30 mins.

Golden Onion Mushroom Quiche Recipe

Cut into wedges and serve warm.

Golden Onion Mushroom Quiche Recipe

I had some leftover dough and filling so I made 4 of these adorable mini quiches with it in these tart moulds that came with my old oven. These only need to be baked for about 20 mins and are fantastic single-serving portions for parties or potlucks.

This was a great "Sweet Punch" for September. Will link to the roundup as soon as its done. Thanks ladies!

Sakkiram Podichinti / Powdered Murukku with Sugar and Coconut

I am fooling you guys on a Monday. This is not a recipe. This is not even normal, I think.

Flashback: my brother does weird things with his evening snacks. When the rest of dunk biscuits in tea, he would put two spoons of peanuts mixture in his tea (that's right, inside his tea) and then drink it up, finally using a spoon to scoop out the sodden mixture bits. As grossed out as I used to be with that, sakkiram podichinti is a brilliant concoction of his.
IMG_3835
These are usually round when whole but a lot of them break during transit
Sakkiram is reddiar murukku. Its made primarily with rice flour and is hand-made through and through. The spiralling design is done by hand and no mould or press can give you that shape. I will post the recipe and how its made soon, but today, here's my brother's whacky snack idea.

IMG_3850

Throw 4 murukku broken into pieces, 1 tbsp grated coconut and 2-3tsp sugar in a mixer bowl.

IMG_3855

Powder it until you get a mixture like so.

IMG_3858

Scrape out the sides - the stuff sticking to the side is the best - and transfer to a bowl.

Powdered Murukku Snack and Hot Coffee

Eat with hot tea or coffee as a snack. If you add more coconut, you can probably make these into balls. We have never bothered!

Update: I called up the brother now to ask how he came up with this idea and he says, our great grandmother used to make this for our grandfather (her son in law, btw) since he lost all his teeth at a pretty young age and never got false teeth. Of course, she never used a Sumeet mixie for it but relied on a pestle and mortar to coarsely grind the murukku as an evening snack for her son in law, but that's where the idea originated from!

Meal Maker / Soya Chunks Cutlets Recipe

This recipe is almost entirely flicked from the sister's blog. She has always been better with her hands than me, so my cutlets look more rugged as compared to her chubby, smooth ones. I am guessing it tasted as good though because these did taste great.

Soya Chunks Cutlet
Soya Chunks Cutlets

Soya chunks give a nice meatiness to the cutlets which is hard for vegetarians to come by. Even if you are not a huge fan of soya chunks, these may just turn you around because the infamous smell associated with soya chunks is absent in these cutlets and overall, these are healthier than their meat/fish counterparts.
Soya Chunks Cutlets
Makes: 12

Ingredients:

For cutlets
1 cup soya chunks
1 large potato, boiled and mashed
1 large onion, chopped fine
1 tsp ginger garlic paste
1 tsp coriander powder / dhania powder / malli podi
2 green chillies, chopped fine (or 1 tsp red chilli powder
1 tsp garam masala (or any curry masala you have in hand)
A pinch of turmeric powder
1/4 tsp pepper powder
A few curry leaves
Salt to taste

For frying:
1 cup bread crumbs (toast 3-4 slices of bread dry and powder in the mixie)
1 beaten egg or a paste of 2tbsp maida with 2 tbsp water
Oil for deep frying
How I Made It:

1. Soak the soya chunks in water for about 30 mins. Drain and squeeze excess water out.

Soaked Soya Chunks Edited

2. Blend in a mixer until fine. Again squeeze out all excess water.

Soaked and ground soya chunks

3. To this, add all the ingredients for the cutlets and mix well.

For Soya Chunks Cutlet

4. Shape this mixture into cutlets, dip first in the egg (or maida mixture) and then the bread crumbs. Deep fry until nicely browned. Make sure you keep the flame in medium-high so that the inside also gets cooked well.

Soya Chunks Cutlet

5. Serve hot with ketchup, or just bite in!

Soya Chunks Cutlet

Thanks for a lovely snack recipe sis. We loved it! :)

Ethakka Appam / Pazham Pori / Banana Fritters - A Kerala Snack Recipe

Ethakka appam / pazham pori, whatever its called, holds a special place in the cuisine of Kerala. Its a quintessential Malayali snack and you get to buy it in every restaurant, roadside snack carts, trains, hostel canteens, college cafes, you name it!
Ethakka Appam Recipe

Yes, its deep friend, yes, its coated in all purpose flour, but its worth it and I want you to take my word on this.

Ethakka Appam Recipe

The bananas used for Ethakka Appam is Ethappazham (the raw version of which, Ethakka, is used to make the famous Kerala banana chips!). It won't taste the same or as good if you use any other kind of banana. Its also called Nenthram Pazham but I can't seem to find a more representative English translation for Nenthram pazham except plaintain.

On to the how-to now.

Ethakka Appam / Pazham Pori Recipe
Serves 2 : About 8-10 pieces

Ingredients
1 Ethapazham / Nentham pazham / Ripe plaintain (the riper and blacker the skin, the better)
1 cup all purpose flour or maida
1 tsp sugar
1/4 tsp baking soda
1/2 salt
A pinch of turmeric powder
About 3/4 cup water (more or less)
Coconut oil to deep fry

How I Made It:

Ethakka Appam

1. Place the flour in a wide bowl.

Ethakka Appam Recipe

2. Add sugar, salt and baking soda. I used brown sugar but white sugar works perfect too.

Ethakka Appam Recipe

3. Add about 1/2 cup water and adjust as you go, to make a batter that's slightly more watery than dosa batter. It shouldn't be too thin, otherwise, the appams will be too oily.

Ethakka Appam Recipe

4. Add in a pinch of turmeric powder. This is only meant for the colour bit and doesn't change the taste or flavour in any way.

Some people add jeera to ethakka appam. I personally don't like biting into them but feel free to add it in if you want.

Ethakka Appam Recipe

5. Cut the plaintain into half and then slice each half midway vertically. Further slice each of the quarters into 2-3 thin pieces. Dunk these into the batter.

Ethakka Appam Recipe

6. Heat the coconut oil until its all bubbly. You have to use coconut oil for the authentic taste. Anything else is a blasphemy so don't tell me if you used vegetable oil or *shudder* olive oil.

I used a super small kadai so that I need only very little oil and that reduces wastage.

Ethakka Appam Recipe

7. When the oil is just short of smoking hot, add in the banana pieces coated with the batter.

Ethakka Appam Frying

8. Fry until golden brown and drain on paper napkins.

Ethakka Appam Kerala Banana Fritters

9. Serve warm with tea.

The appams get soggy and the coating gets chewy and soft once cold so this is best served warm. But when I was a kid, I used to wait till it got cold and chewy :)