Showing posts with label Tomatoes. Show all posts

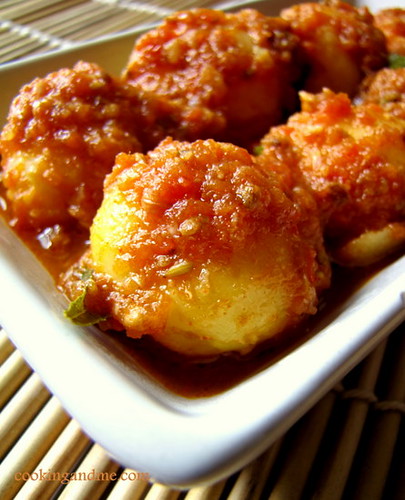
Heavenly Sesame Potatoes in Hot n Sweet Tomato Sauce

This recipe has probably spent the maximum number of days in my bookmarks. At the time I read this, I had just  moved to Singapore and didn't have a kitchen, let alone sesame oil and the rest of the ingredients this recipe requires. I finally made it a few weeks back and it was as yummy as I had imagined. Thank you Rajani for a keeper of a potato recipe that's both easy and delicious.


Sesame Heavenly Potatoes


Heavenly Sesame Potatoes in Sweet Tomato Sauce
Adapted from: Rajani's EatWriteThink


Ingredients:
Serves: 2

2 large potatoes, cut into wedges (I used russet potatoes)
1 large onion, chopped fine
2 tomatoes, sliced into small pieces
1 small capsicum (or half of one), chopped fine
2 tsp soya sauce
1/2 tsp brown sugar (white sugar is also fine)
1 tsp crushed garlic (or 1/2 tsp garlic paste)
1 tsp red chilly powder
2 tbsp gingelly / sesame oil (must use this oil)
Salt to taste
Coriander leaves or spring onions, for garnish

How I Made It:

1. Shallow fry the potato wedges in oil until golden brown. Set aside to drain on a kitchen napkin.

2. In the remaining oil, add the onions and garlic and fry until golden brown. Then add the chilly powder and fry for a minute. Then add the tomatoes and saute until soft and mushy.

3. Turn heat to high and add the soya sauce and sugar. Fry on high for a minute and lower to medium heat. Add the capsicum and salt and mix well. Remove from fire after about 3-5 minutes.

4. Spoon this sauce over the potatoes and serve warm with garnish.

Heavenly Potatoes Recipe II

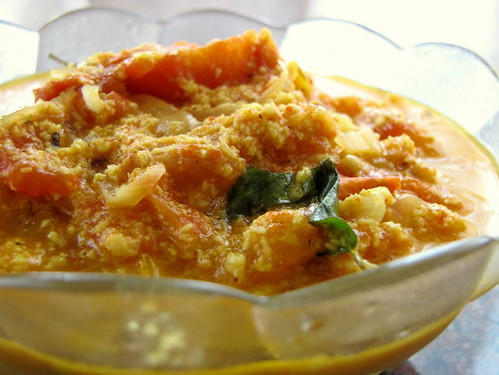
Thakkali Thella Pulusu / Tomato Coconut Gravy Recipe

Thella pulusu and vatti pulusu are the two most popular Reddiar curries (kozhambu / pulusu). While growing up, I definitely liked the milder thella pulusu but now, home food means a good thoran with vatti pulusu. Ah yumm. My aatha (amma's amma) used to make the best vatti pulusu (the recipe of which my sis has shared here).

This recipe is actually very similar to Arch's tomato saar recipe that I had posted pics of the other day. But there are some minor differences that  make them taste significantly different.


Considering Reddiars are kinda going extinct, I really should have posted this long back but here goes anyway. I couldn't ask aatha for her exact recipe before she passed away but amma has a pretty good approximation of the recipe so sharing that here.


You can add any vegetable of your choice, the most popular ones being tomatoes, drumsticks, brinjal, etc. I made my favourite, the tomato version with drumsticks. 

Thakkali Thella Pulusu 
Serves 4

What I Used:

1 big tomato, cubed
1 drumstick, cut into 4" pieces
1 cup tamarind water (from a small lime-sized ball of tamarind)
Salt to taste

Grind to a paste:
1/2 cup grated coconut
4-5 shallots / ulli
1/2 tsp jeera
2 dry red chillies
A pinch of turmeric
1 clove of garlic

For tempering:
2 tsp oil
A few fenugreek seeds / uluva / menthayam
1/4 tsp mustard seeds
A few curry leaves
4-5 sliced shallots

How I Made It:

1. Take the tamarind water in a kadai and add the tomatoes and drumsticks to it along with salt. Bring to boil.

2. Add the ground masala paste to this and continue to boil on sim until the drumsticks are soft. This should take about 12-15mins. Add water as necessary to keep the consistency right (same consistency as sambar). Remove and set aside.

3. Heat oil and add all the ingredients for tempering. Once the mustard seeds have popped and the fenugreek seeds are roasted (take care not to burn them!), dunk them into the gravy. Mix well, adjust salt.

Serve hot with rice, mezhukkupuratti and pappadom.

On other news, I am giving away a waffle maker in MMKT and the last date to enter is April 25th 2010 - midnight SG time (GMT + 8:00). So HURRY! 

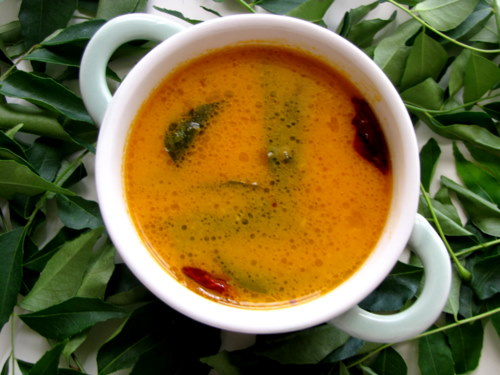
The one where I am bored but also includes Tomato Saar Recipe Link

Yes, I am bored. Of what? Of:

- blogging regular every-day recipes like rasam and sambar and paratha and paneer butter masala.
- looking at the same old template that this site has been stuck with since the middle of last year (or has it been longer?).
- looking at my Reader chock full of blogs I am yet to read simply because I am too tired or busy to comment and I hate leaving a site without commenting. I have to say something (only genuine stuff though, don't worry).

What does this mean?

I think the content of this site needs some serious overhaul. I am going to look for those gems out there. In other blogs and sites, in cookbooks, in relatives' kitchens, everywhere! Recipes that are not run-of-the-mill. Recipes that are quick or are worth the extra time you may need to spend on them.

I only have two more recipes in my draft, one is the tomato saar that's coming up and the next one is Methi Paratha so don't tease me when I post that because a Methi Paratha recipe is anything but radical.

But.

This is like a resolution I have for the blog so let's see how it goes. For now, I am going to leave the template alone. God knows how obsessed I can get when I start editing it.


Now onto the Tomato Saar Recipe. This is directly lifted from Arch's blog, The Yum Factor. Tried it based on SJ's reco and loved it. Thanks Arch!

Potatoes in Red Coriander Sauce Recipe

This is a quick and easy Potato Recipe from Complete Indian Cooking by Mridula Baljekar, et al. I have tried quite a few recipes from this book with good success and this one was a must-try for two reasons.

1. Its the simplest recipe in the book!
2. It has the least number of ingredients and still looks so good.

Actually, there's one more reason: I love coriander. I hardly ever use coriander seeds in anything other than vatha kozhambu and the like but this recipe calls for whole coriander seeds. The flavour was delightful.

Potatoes in Red Coriander Sauce
Serves: 2
Preparation time: 15-20 mins
Source: Complete Indian Cooking by Mridula Baljekar, et al.

What I Used:

A dozen baby potatoes (or 3 potatoes, cubed)
1.5 tsp coriander seeds / malli
1.5 tsp cumin seeds / jeera / jeerakam
4 garlic cloves
3 tbsp thick tamarind juice (or 1 tbsp readymade tamarind paste)
1 pureed tomato (or chopped fine)
A few curry leaves
1/2 tsp sugar
2 tbsp oil
Salt to taste
Coriander leaves / kothamalli to garnish

How I Made It:

1. Boil the potatoes in water until they are cooked yet not mushy. You can pressure cook for 1 whistle to make the job easier.

2. Grind the coriander seeds with the cumin seeds and garlic cloves to a coarse paste using a pestle and mortar or your small mixie jar.

3. Heat oil in a pan and add the ground paste with the tamarind juice, tomato puree, curry leaves, salt and sugar. Lower fire to medium-low and cook until the oil separates (about 7-10 mins)

4. Add the potatoes and stir well until coated with the sauce. Cover and simmer for about 5 mins. Garnish with fresh coriander leaves and serve hot.


Note

- Instead of using whole coriander and cumin seeds, their powders can also be used. This will help you avoid the grinding, although the flavour will change a bit. It still tastes good, I have tried it both ways :)

Its been ages since I sent entries to any events so I am glad this fits in perfectly with Sunita's Think Spice event hosted by Priya, this month featuring coriander seeds.

Thakkali Muringakka Aviyal Recipe / Tomato and Drumsticks in Coconut

I don't know if this a common Kerala recipe but ever since I can remember amma has been making this a quick side dish for Chicken Biryani. Her rationale is, biryani is intense and doesn't have coconut and any Malayali should know that we always pair curries with coconut and without coconut together, to balance the flavours.

Amma sent me the recipe through my uncle who typed it out while she listed the things to be done. The picture was taken in Kottayam when I was there this August and amma made it, not me :)

thakkali muringakka aviyal

Thakkali Muringakka Aviyal Recipe
Source: My mom
Preparation time: 30 mins

What Is Needed:

4 tomatoes, sliced into six long pieces
1 drumstick / muringakka, cut into 3" pieces
1/2 cup grated coconut
12 peeled shallots / chinna vengaayam / cheriya ulli
2 flakes garlic
1/4 tsp jeera / cumin seeds / jeerakam
1 tsp red chilly powder
A few curry leaves
1/4 tsp mustard seeds / kaduku
1 tbsp oil (preferably coconut oil)

How Its Made:

1. Add the chopped drumstick to about 1 cup water with with some salt and the chilly powder. Keep on a medium flame and cook until soft. The mixture shouldn't be too watery, so if it is, boil some more on a low flame.

2. To this, add the cut tomatoes and cook some more until the tomatoes begin to soften.

3. Grind together - coconut + jeera + garlic to a coarse paste.

4. Heat oil in a pan and add the mustard seeds. When they pop, add the shallots and curry leaves. Fry for about 2 mins, until the shallots soften.

5. Next, add the ground coconut paste and fry for another 1 min. To this, add the drumstick and tomatoes. Mix well. Simmer for 2-3 mins until well combined. Adjust salt.

Serve hot with steamed white rice or chicken biryani.

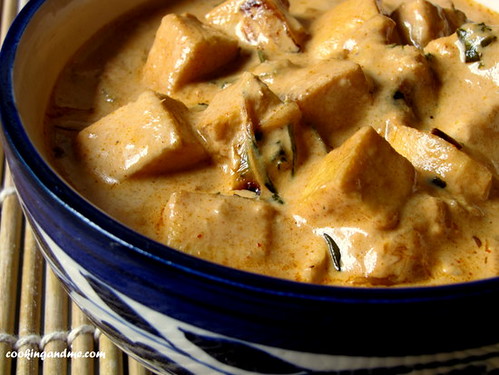
Paneer Butter Masala: Restaurant-Style Recipe - Step by Step

Let's talk about Paneer Butter Masala today. Not just any kind, the kind that you get in Indian restaurants. Why? Well, I've already posted the Paneer Butter Masala Recipe I usually make, long back. Its also one of the most popular recipes on this site for two reasons:

- since its a popular Indian dish, a lot of people have tried it from my site and sent me feedback.
- this is the only recipe that has received as many good feedback as disappointing feedback.

Most people said this or a variation of this - "I tried your paneer butter masala recipe today. It came out nicely, I did everything you mentioned but it didn't come out like the one we had in that North Indian restaurant last weekend and my husband/wife/mom/dad/sibling loved! Help!"

I guess they found my Paneer Butter Masala Recipe too homely!

In most Indian restaurants, dishes are more creamy and have thicker gravy. The reason is very simple - they use cream. They use it as the base of every dish you order and it may make the dish arguably tastier. This is not hard to whip at home provided you have no qualms about adding that bit of cream and kicking up the amount of oil a notch.

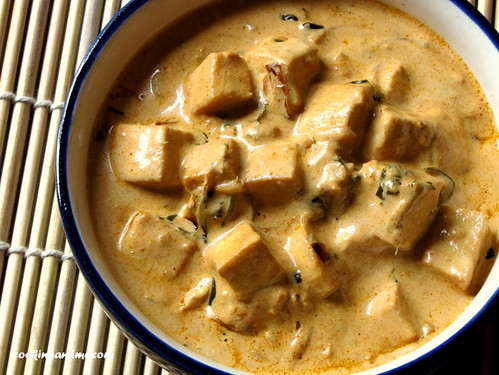
So here it is, my second Paneer Butter Masala Recipe, like they serve in Indian restaurants!

Oh did I mention its going to be step-by-step? Also, a huge thanks to my cousin Divya for giving me the basic recipe. Ok here goes, a picture of the final dish.

I'd say the only thing that's different from this dish and the one you get in Indian restaunts is the difference in the colour. That's because they add red food colour and I didn't.

Ok, let's get started.

Add 2 tbsp oil to a hot pan and swirl around until the base of the pan is well coated.

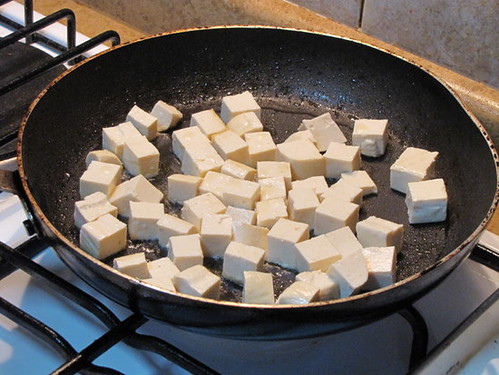
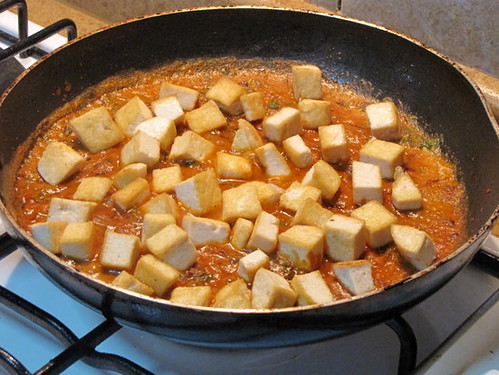
Add in cubed paneer pieces.

(Sidenote: Let's please pretend these are paneer pieces 'cuz its actually tofu. I was out of paneer and couldn't go all the way to get some. Also, it tastes as good with tofu, trust me!)

Lightly fry the paneer cubes until golden brown on all sides.

Drain and set aside on a plate lined with a paper napkin.

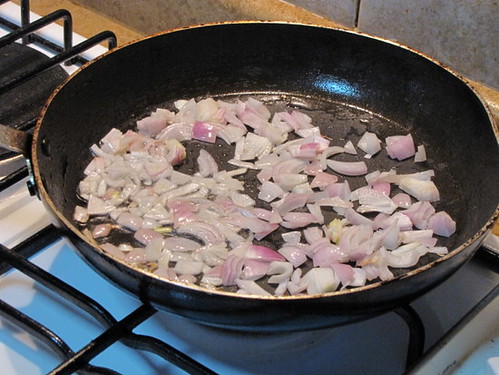
Add 1tbsp oil to the same pan and thrown 1 medium-sized chopped onion.

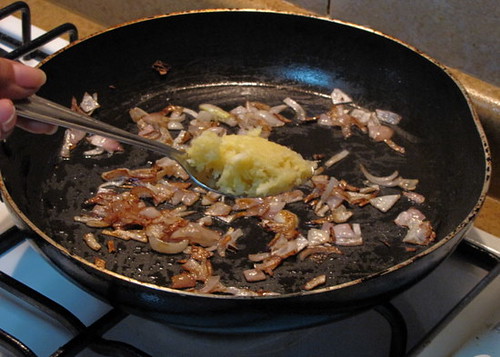
Fry until golden brown. To this, add 1 tbsp freshly minced ginger-garlic paste. (Ok fine, use your bottled paste, it just doesn't taste as good)

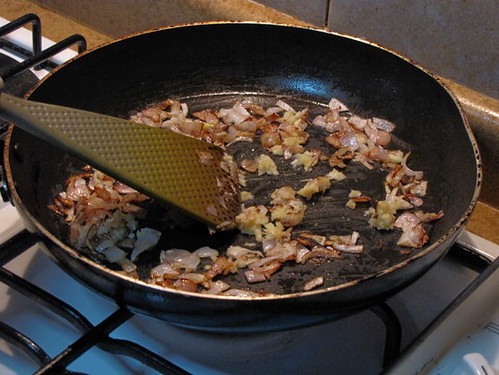
Fry for a minute.

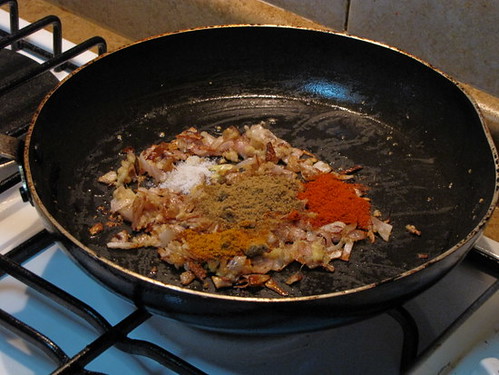
To this, add 1 tbsp dhania powder/malli podi, 1 tsp chilli powder, 1 tsp garam masala and 1/2 tsp salt. Fry for 30 seconds until the masalas are well combined.

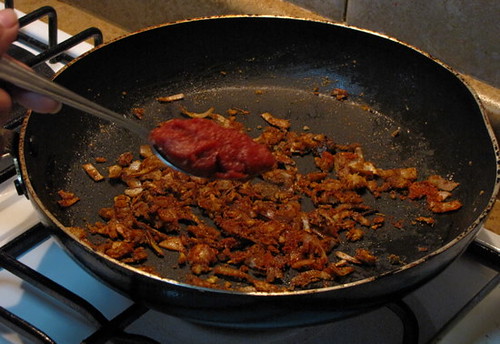
Next you need 1 tbsp tomato paste. I used the same kind I used for the Tomato Spinach Pulao. If you don't have tomato paste handy, just puree 1 medium-sized tomato and add it at this stage.
Next we need tomato ketchup or tomato sauce, the bottled Maggi/Heinz kind. Add in an almost-1tbsp of this.

Bring out your kasuri methi next. A generous pinch of this needs to go in.

(This picture makes my heart break, btw. The focus should've been on the kasuri methi but its actually on the blob of tomato sauce in the pan. Well, I took only one shot and my hands were smeared with oil and ketchup and I had to balance.. oh never mind!)

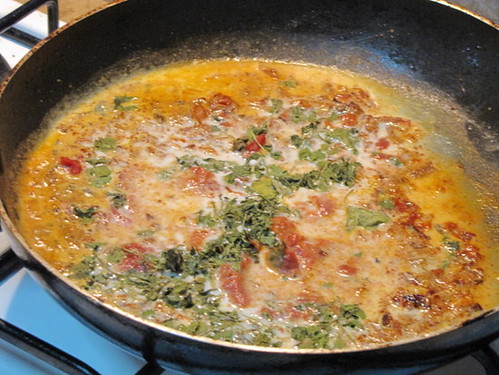
To this mixture, add 1/2 cup milk. Mix well and cook covered for about 5 minutes on low fire.

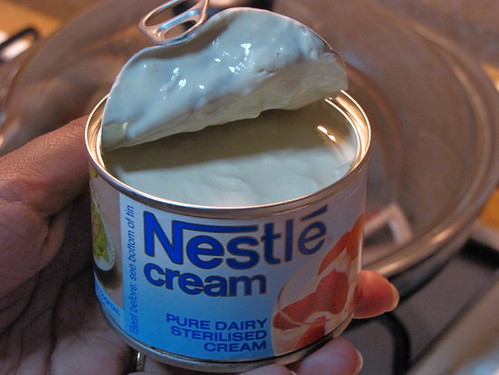
Meanwhile, bring out the secret ingredient for making restaurant-style paneer butter masala (or any Indian curry for that matter). CREAM!

I used Nestle cream but if you have fresh cream, please oh please use that. Just open the can and set aside or get your fresh cream ready.

Once the tomato sauce mixture has cooked covered for 5 mins, open and add the fried paneer.

Top this off with 1 cup cream. Mix well and simmer on low fire for 3-4 mins. Adjust salt.

The recipe again, all in one place.
Paneer (or Tofu) Butter Masala: Restaurant Style Recipe

What I Used:

Paneer/tofu - 1 block, approx. 2 cups of cubes
Onion - 1 medium-sized one, chopped fine
Ginger-garlic paste - 1 tbsp
Dhania powder/malli podi/Coriander powder - 1 tbsp
Garam masala - 1 tsp
Red chilli powder - 1 tsp
Tomato paste- 1 tbsp (or 1 tomato, pureed)
Tomato sauce/ketchup - almost 1 tbsp
Kasuri methi/dried fenugreek leaves - 1 generous pinch
Milk - 1/2 cup
Cream - 1 cup
Oil - 3 tbsp
Salt - to taste

How I Made It:

1. Heat 2 tbsp oil in a pan and fry the paneer/tofu cubes until golden brown. Drain and set aside.
2. In the same pan, add 1 more tbsp oil and fry the onions until golden brown.
3. Add the ginger garlic paste and fry for a minute.
4. Next, add the dhania, garam masala, chilli powder and some salt. Fry for 30 seconds.
5. To this, add the tomato paste/puree, tomato sauce and kasuri methi. Mix well and add the milk.
6. Lower fire and cook covered for 5 mins.
7. Open lid, add the fried paneer/tofu and the cream. Mix well and simmer for 3-4 mins.
8. Garnish with fresh coriander leaves if you have any.
Serve warm with rotis/pulao/jeera rice.

Its yummy, no doubt. Probably not something you want to make every weekend but its good when you entertain guests and people end up having only 2-3 spoons of one dish anyway. Its also a good recipe to "wow" your non-Indian friends.

Because when they Paneer Butter Masala, this is what they expect!

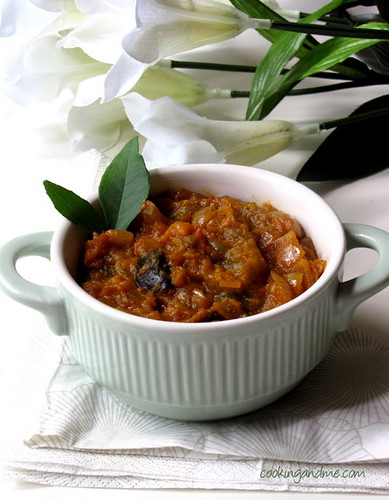
Baingan Bharta - Recipe with Grilled Eggplant & Spices

I don't what it is about Punjabi recipes that is so alluring. Both TH and I, though born South Indians, have a huge affinity towards North Indian food. His favourite meal of all times would be garlic naan and palak paneer (which he orders in every Indian restaurant we every go to!) and I love my khadis, and khichdis and paneer butter masala too.

This is another recipe I'd been meaning to try forever. I had bookmarked a lot of variations from different sources but ended up making it my way. The ingredients list is basically the same across all baingan bharta recipes I saw online but I largely adjusted the amount of spices to suit our taste. Please be mindful of that when you try our your version.

Baingan Bharta Recipe
Serves: 4
Preparation time: 15mins grilling eggplant + 45mins for chopping and cooking

What I Used:

2 medium tomatoes, chopped
2 medium onions, chopped fine
3 green chillies (adjust to taste, I used Indian green chillies)
1 tsp minced ginger
1/2 tsp minced garlic (optional)
1 tsp of Kashmiri chilli powder (for the deep red colour. If using ordinary red chilli powder, please be mindful of the extra heat)
1 tbsp coriander powder / malli podi
1 tsp garam masala
1/4 tsp turmeric powder
1 tsp cumin seeds
1 tbsp oil
1 lime wedge
Fresh coriander leaves for garnish
Salt

How I Made It:

1. Grill the eggplant, cool, peel, mash and set aside.

2. Heat oil in a pan and add the cumin seeds. Once they sizzle, add the chopped onions, green chillies, ginger and garlic with a pinch of salt.

3. When the onions turn pink (don't brown it too much), add the garam masala, coriander powder, turmeric and chilli powder. Fry for 10 seconds and then add the chopped tomatoes. Mix well and cook covered for about 10 mins, stirring once or twice in between.

4. Once the tomatoes are cooked soft, add the mashed grilled eggplant and mix well. Adjust salt and let it simmer for 5-7 mins, stirring occasionally.

5. Remove from fire. Squeeze some lime juice and mix well. Garnish with fresh coriander leaves and serve hot with rotis/phulkas/jeera rice.
This has become our favourite side dish with phulkas. If it didn't take this long for the eggplant to grill + make the baingan bharta, we would have this for dinner every other day.

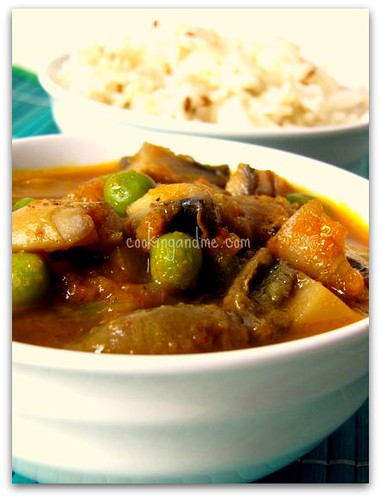
Mushroom Peas Curry / Matar Khumb Curry Recipe

I love those small recipe booklets by Neeta Mehta. They are nicely themed and mostly have traditional and easy recipes. This particular one where I got this Matar Khumb recipe has Punjabi recipes that are extremely popular yet I've never tried before, except maybe the Paneer Butter Masala recipe.

I've already tried two recipes from the book and loved them both. Here's the first one.

Mushroom Peas Curry / Matar Khumb Curry
Adapted from Neeta Mehta's Punjabi Recipes
Serves 4

What I Used:

200gm/about 4 cups mushrooms, washed and chopped into 6 (I used white button mushrooms)
1 cup green peas
2 cardamoms/elaichi/elakka
2 cloves/laung/grampoo
1 tbsp dhania powder / malli podi
1 tsp red chilli powder
2 tsp garam masala
A pinch of turmeric powder
4tbsp oil

Grind together to a puree
2 large tomatoes
1 green chilli

Grind together to a paste
1 large onion
6-8 flakes garlic
1" piece ginger

How I Made It:

1. Heat oil. Add the cardamom and cloves. Fry for 1 min.
3. To this, add the onion-garlic-ginger paste. Cook stirring continuously until light brown. Remove from fire.
4. Add the masalas now - dhania powder, red chilli powder, garam masala and haldi with some salt.
5. Return to low heat and cook for a few seconds. Add 1 tbsp water.
6. Add the tomato-green chilli puree. Cook till dry and oil separates from the gravy (about 10 mins)
7. Next, add the mushrooms and peas. Stir fry for 5 min.
8. Add 2 cups water. Cook on low medium heat for about 15 min till peas turn soft and oil separates. Adjust salt.
Serve curry with rice or chappatis. I served mine with some jeera rice.

Tomato Spinach Pulao - Step by Step Recipe

Whenever I post step-by-step recipes for baking, most of you love it, try it and give me your thoughts. I have been itching to do the same for normal recipes too, but the only reason stopping me was the poor lighting in my kitchen. After many months of giving myself this excuse, I decided to go ahead and do it anyway.

Because of this, you will see pictures with different lighting in this post, so bear with me. Hopefully you find it useful (not the lighting, the recipe!)

After all that talk, I'm hungry. Let's have a nice bowl of hot tomato spinach pulao, shall we? If you want to skip the pictures and yada-yada, scroll to the end of this post for the recipe in one place.

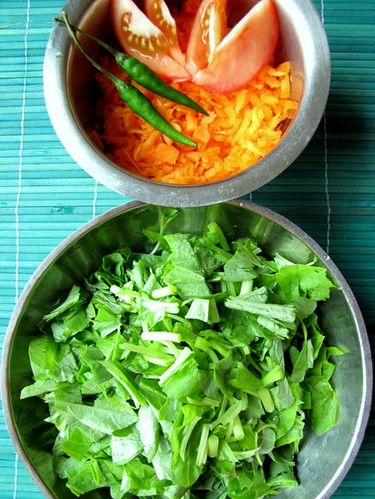
Ok. First, chop 4 cups of green spinach, 2 tomatoes and grate 1 carrot and set aside (ignore the green chillies, we don't need them, unless you want to use them and reduce the amount of red chilly powder in the recipe).


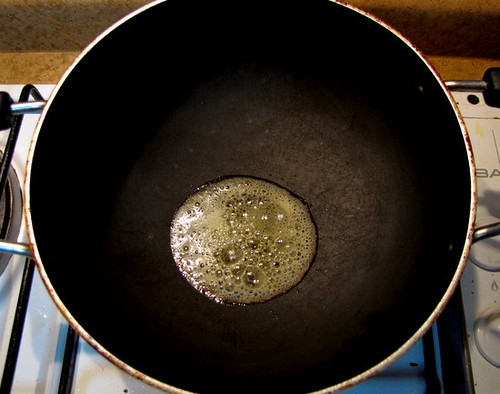
Heat 1 tbsp oil in a kadai.


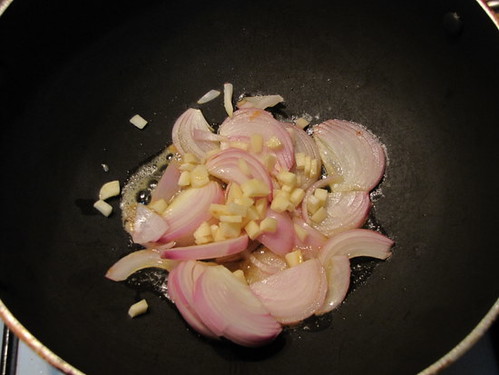
Add 1 sliced onion and 3 cloves of chopped garlic to this.


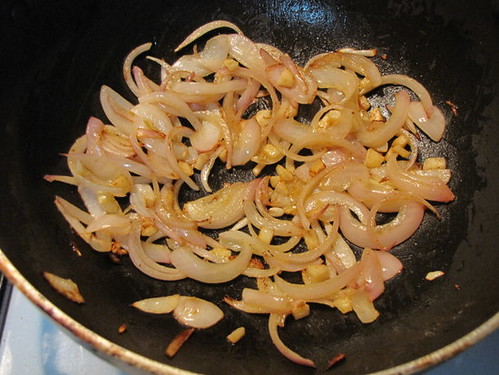
Fry until the onions turn transparent and brown slightly.


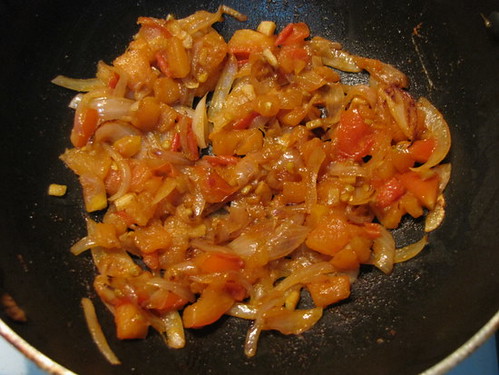
Time to bring out the 2 chopped tomatoes. Add these to the fried onions.


Cook well until the tomatoes have wilted and turned soft.


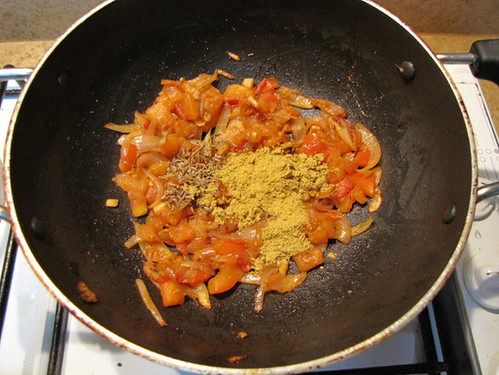
To this, add 1 tbsp coriander powder and 1 tsp jeera. Mix well.

Time to spice things up a bit. Bring out your red chilly powder and add about 2 tsp of that. Go on, dare yourself and add another tsp if you wish ;)


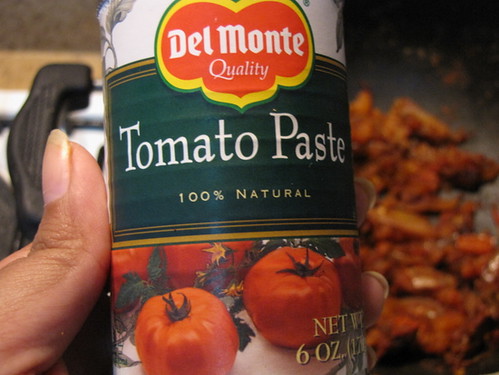
We've already added 2 tomatoes but since this is tomato spinach pulao, we will need a more dense tomato flavour. Canned tomato paste works best.


Add 1 tbsp of that and mix well. If you don't want to use the paste, add 1 more large tomato in the first step.


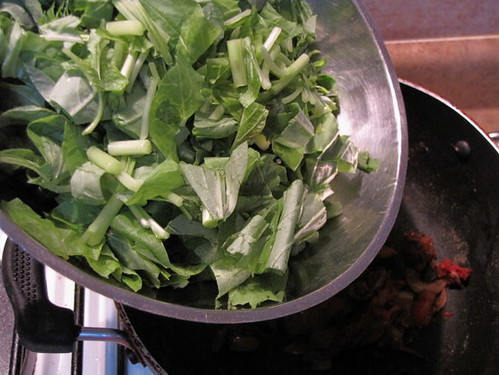
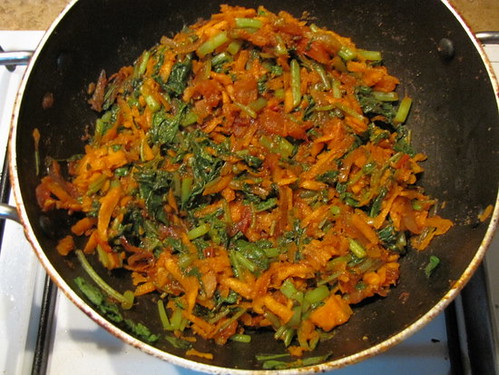
To this, add the chopped spinach and..


.. grated carrot and mix well.


Close the kadai and let it cook on medium-low fire for about 10 mins. Don't add any water, the spinach will give out its own water while cooking making the mixture soft.


Open kadai carefully after 10 mins and add salt.


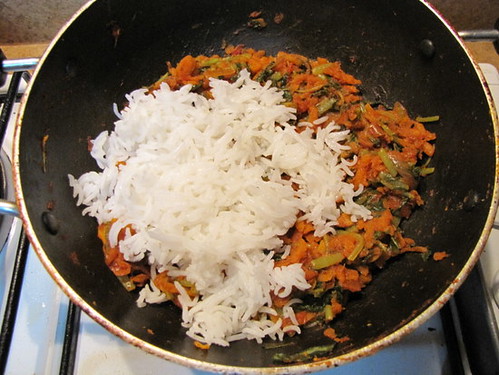
Add about 3 cups cooked rice to this mixture. I used basmati rice but any rice will do, even warmed leftover rice.


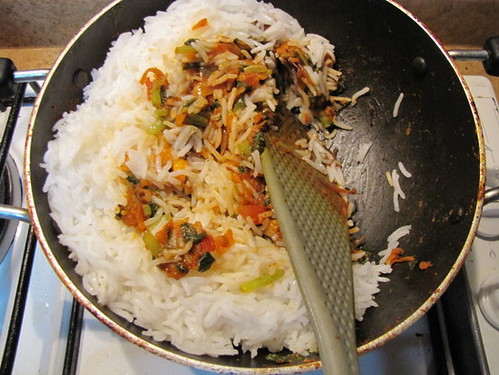
Gently fold from one side so that the rice isn't mashed up too much.


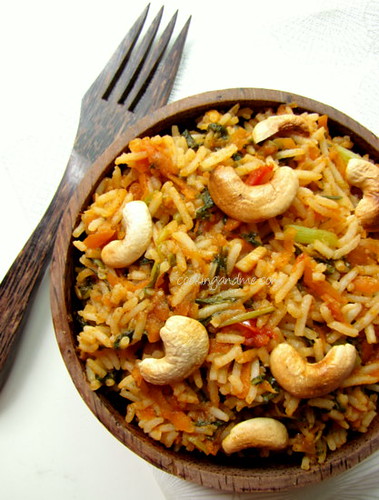
Garnish with some roasted cashwes and serve hot. I roasted the cashewnuts in the microwave on medium power for a minute. Saves time and oil.

Here's the pulao recipe again, all in one place.
Tomato Spinach Pulao
Serves: 3 to 4

What I Used:

3 cups cooked rice
4 cups chopped green spinach
1 grated carrot
2 chopped tomatoes
1 tbsp tomato paste (or add another tomato)
1 sliced onion
3 cloves chopped garlic
1 tbsp coriander powder / malli podi / dania powder
1 tsp jeera / jeerakam / cumin seeds
2 tsp red chilly powder
1 tbsb oil
Roasted cashewnuts to garnish (optional)
Salt to taste

How I Made It:

1. Heat oil and fry the onions and garlic for 3 mins. Add the tomatoes to this and cook well until soft and mashed.

2. Add the coriander powder, jeera and red chilly powder. Mix well and fry for 2 mins. Add tomato paste to this, if using, and mix well.

3. Add chopped spinach and grated carrot. Close and cook for 10 mins until soft.

4. Add salt and cooked rice to this. Fold gently and serve after 3o mins, garnished with roasted cashewnuts.

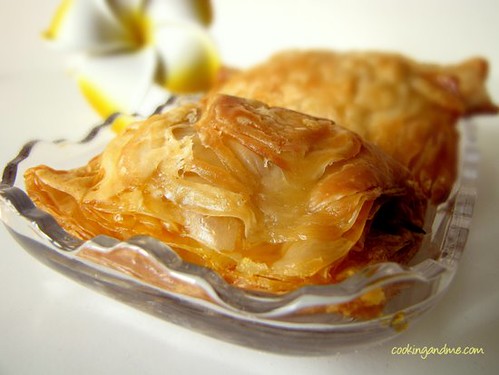
Vegetable Puffs With Puff Pastry Sheets

When I was in India, I used to drool over a lot of food blogs of people abroad, mainly at all the ingredients they got to cook with. Among fresh berries and different kinds of chocolate and cheese was puff pastry sheets. I was quite amazed at how much difference it can make to baking something like puffs or twisted puff snacks and tons of other variations to these.

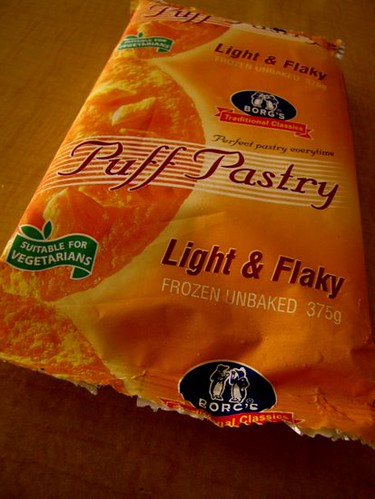
I bought my first packet a few weeks ago and it stayed in my freezer till my India trip was over. When it finally reached a point when I had no more excuses to postpone using it, I did!

The first thing I did was to look online for help on how to start using it. The packet had no instructions except to say "thaw for 30 mins to an hour before use". That was well and good but how exactly do I use this chunk of frozen pastry sheets? I searched online for difference things - how to use puff pastry sheets? how to roll out puff pastry? how to divide puff pastry and all synonyms of words in here. I checked some blogs that I remembered had used these but they seemed to know how to since they had lovely pics of puffs - their final products!

I even checked Youtube but nothing useful came up. Then I just guessed my way through it and turned up with pretty awesome vegetable puffs. Here's how.


How to Thaw and Use Puff Pastry Sheets:

1. Take out the packet about 2 hours before you want to use it. Mine took about 2.5 hours to thaw completely and become soft. It will be a big block.

2. Place it on a liberally floured surface and roll it out firmly to about 1/2" thickness. You will get a biggish rectangular piece of puff pastry.

3. Cut out into long rectangles for puffs or other shapes depending on your use.

That's it. That's what I did.

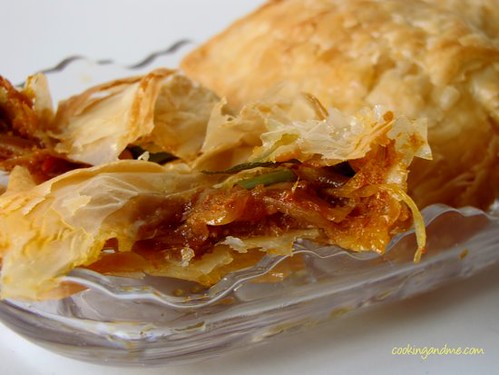
When you make vegetable puffs, the filling is very flexible too. You can pretty much make and add anything. Here's what I did.
Vegetable Puffs Filling Recipe

What I Used:
Makes 8 puffs

Mixed vegetables - 1 cup (I used carrots, French beans, sweet corn and green peas)
Onions - 2, sliced long
Tomatoes - 2, chopped
Capsicum / green bell pepper - 1/2 cup, chopped
Coriander powder /malli podi - 1 tbsp
Jeera /cumin seeds / jeerakam - 1 tsp
Red chilli powder - 1 tsp or to taste
Ginger garlic paste - 1 tsp
Curry leaves - a few
Oil - 1 tbsp
Sugar - a pinch
Salt - to taste

How I Made It:

1. Boil the vegetables until soft and keep aside.

2. Heat oil and saute the onions until golden brown. Add the curry leaves, coriander powder, chilli powder and jeera. Fry for 30 seconds.

3. Add the ginger garlic paste and fry for another minute.

4. Now add the tomatoes and capsicum and fry well till its blended well.

5. Finally add the vegetables and salt and sugar and mix well. Cook on open fire for about 5 mins. Don't add water at any stage. The filling should be moist yet thick.


To Assemble Puffs Before Baking:

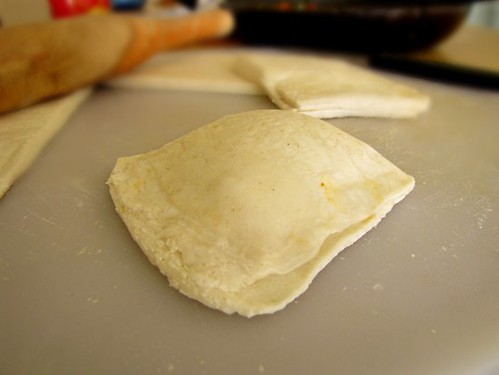
- Take a rectangular strip of rolled out puff pasty sheet and spoon in some filling on one end, leaving enough space on all sides to 'seal' the puff.

- Bring in the other end and seal off the sides. The puff pastry is usually sticky so you wouldn't need anything else to seal it up.

Baking

Bake in a preheated oven at 220 Centrigrade for 30 mins until the top is golden brown. You can brush on some egg white while still warm out of the oven to make it look prettier and glossier.

If you want to make egg puffs, add hard boiled eggs in the place of vegetables. Place half an egg in each puff.